Countdowns

How to use, create, add and test countdowns.

Why use it?

It is used to make a change of state of some components within some modules. The components that can change state are:

  • Header: the CTA

  • Banner: remove banner, text and CTA

  • Hero: title, subtitle, description and CTA

The most common state change is from the WAITLIST phase to the SALES phase, in which case all the components mentioned above usually change, announcing that the tickets are now available for sale.

How to create it?

To create a countdown you must follow the steps below:

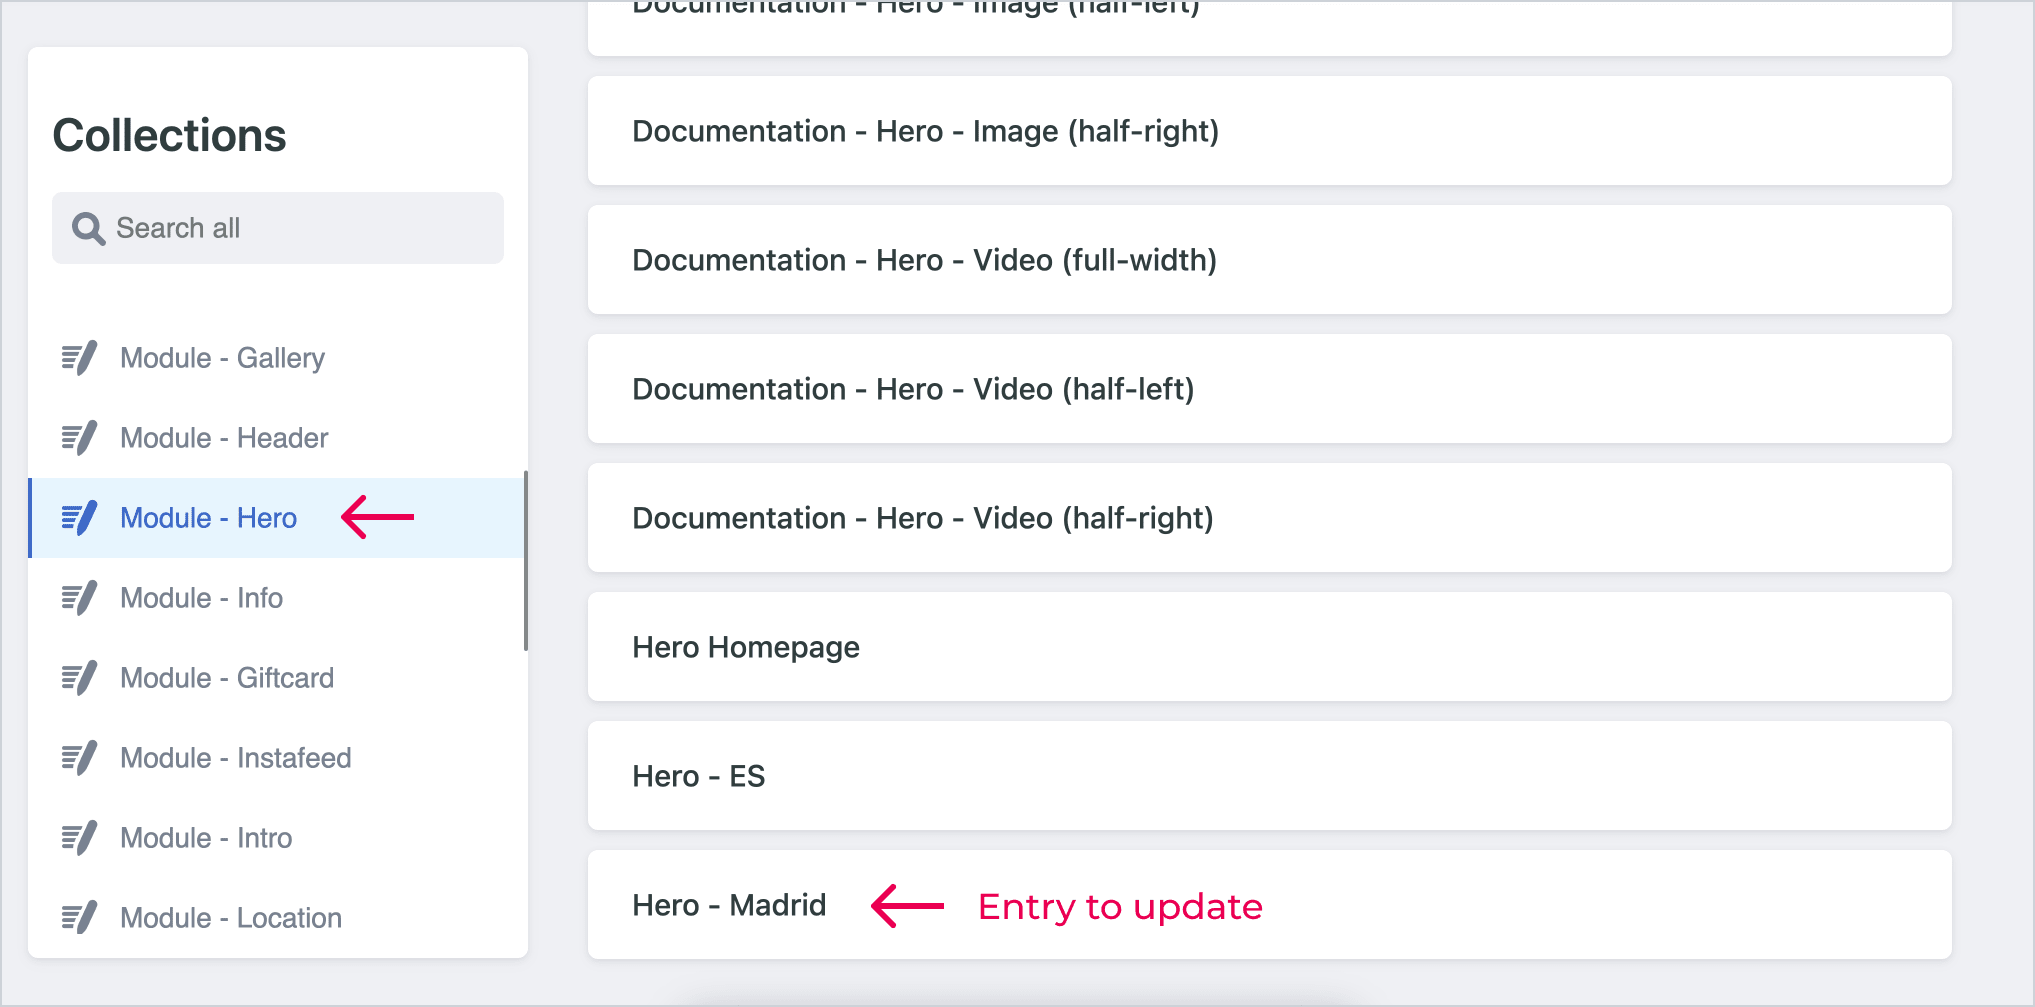
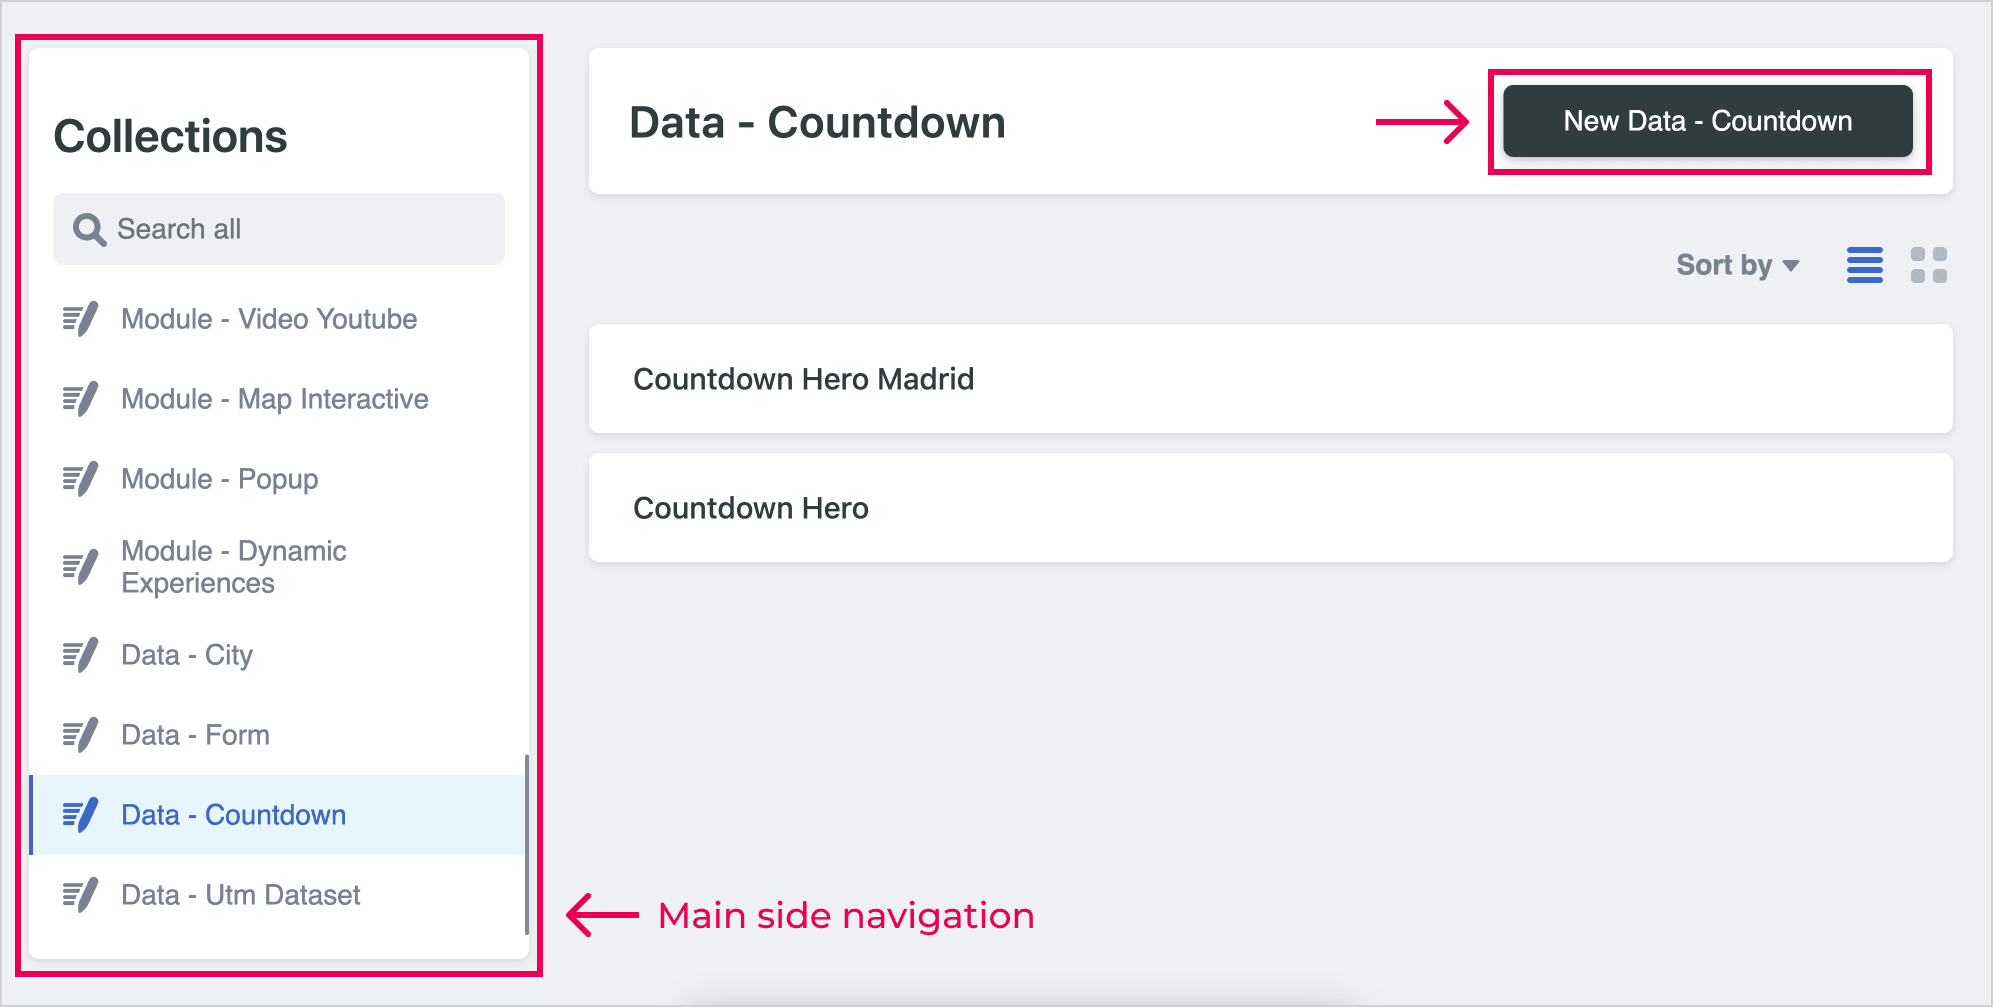
  1. Go to the “Main side navigation” and click on “Data - Countdown”. Here you will find a list of all the countdowns that were added previously.

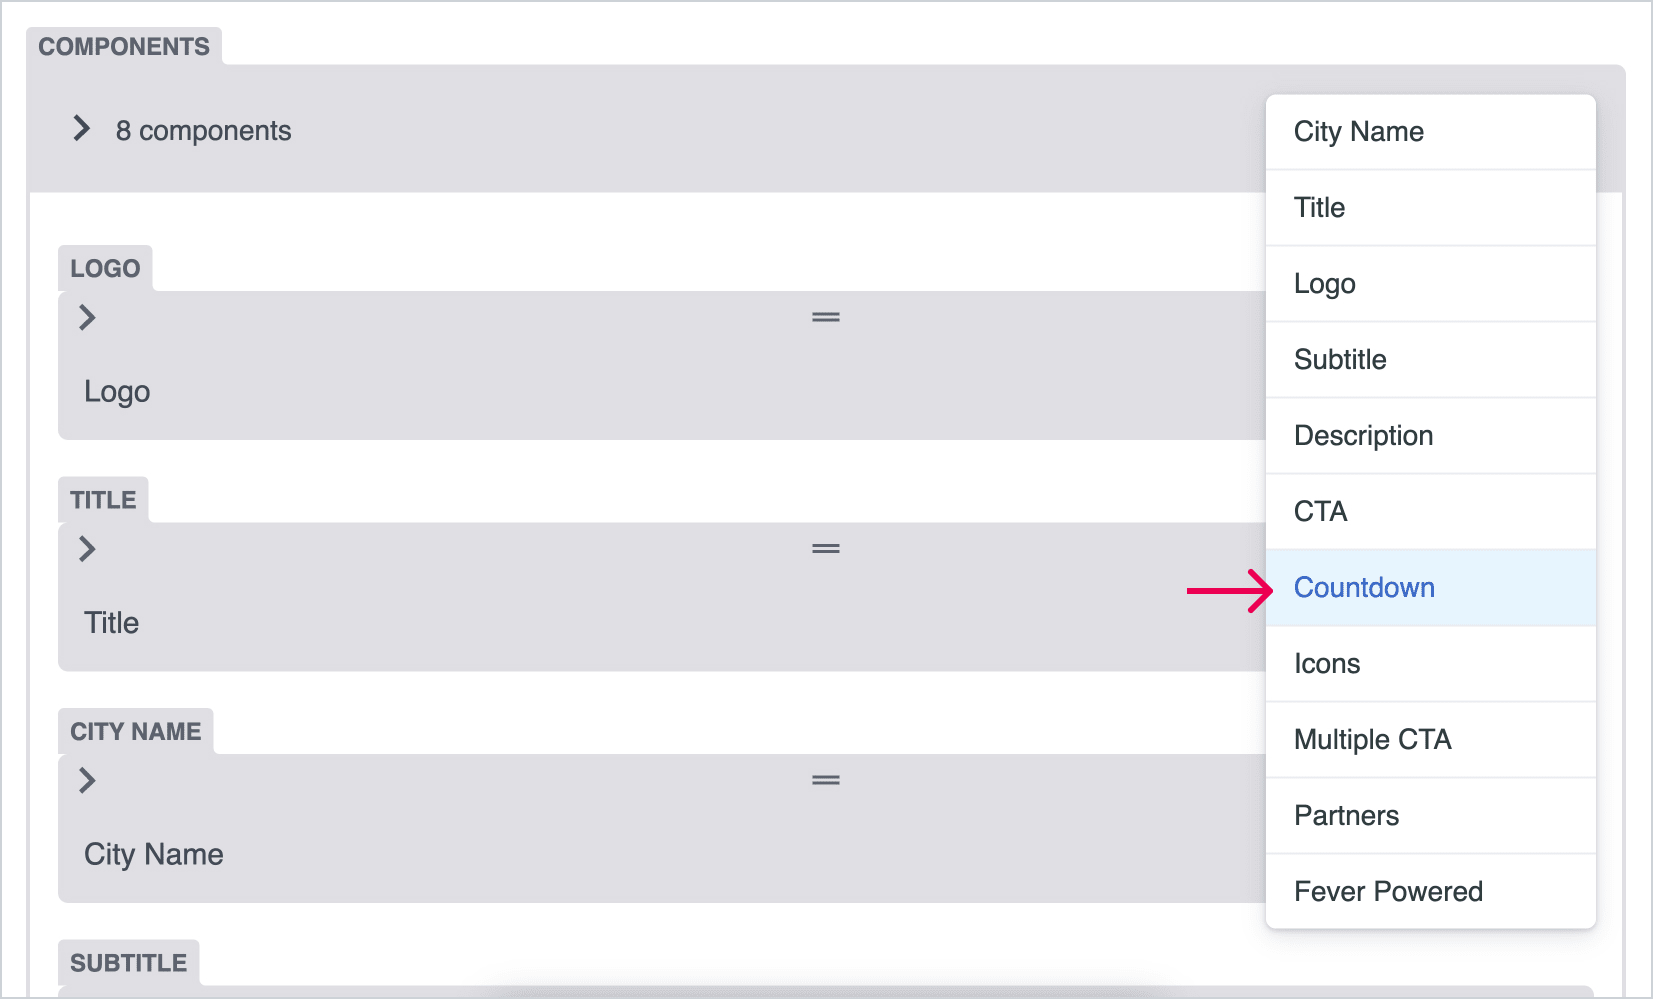
  2. Click on the “New Data - Countdown” button. This button redirects to the countdown settings page.

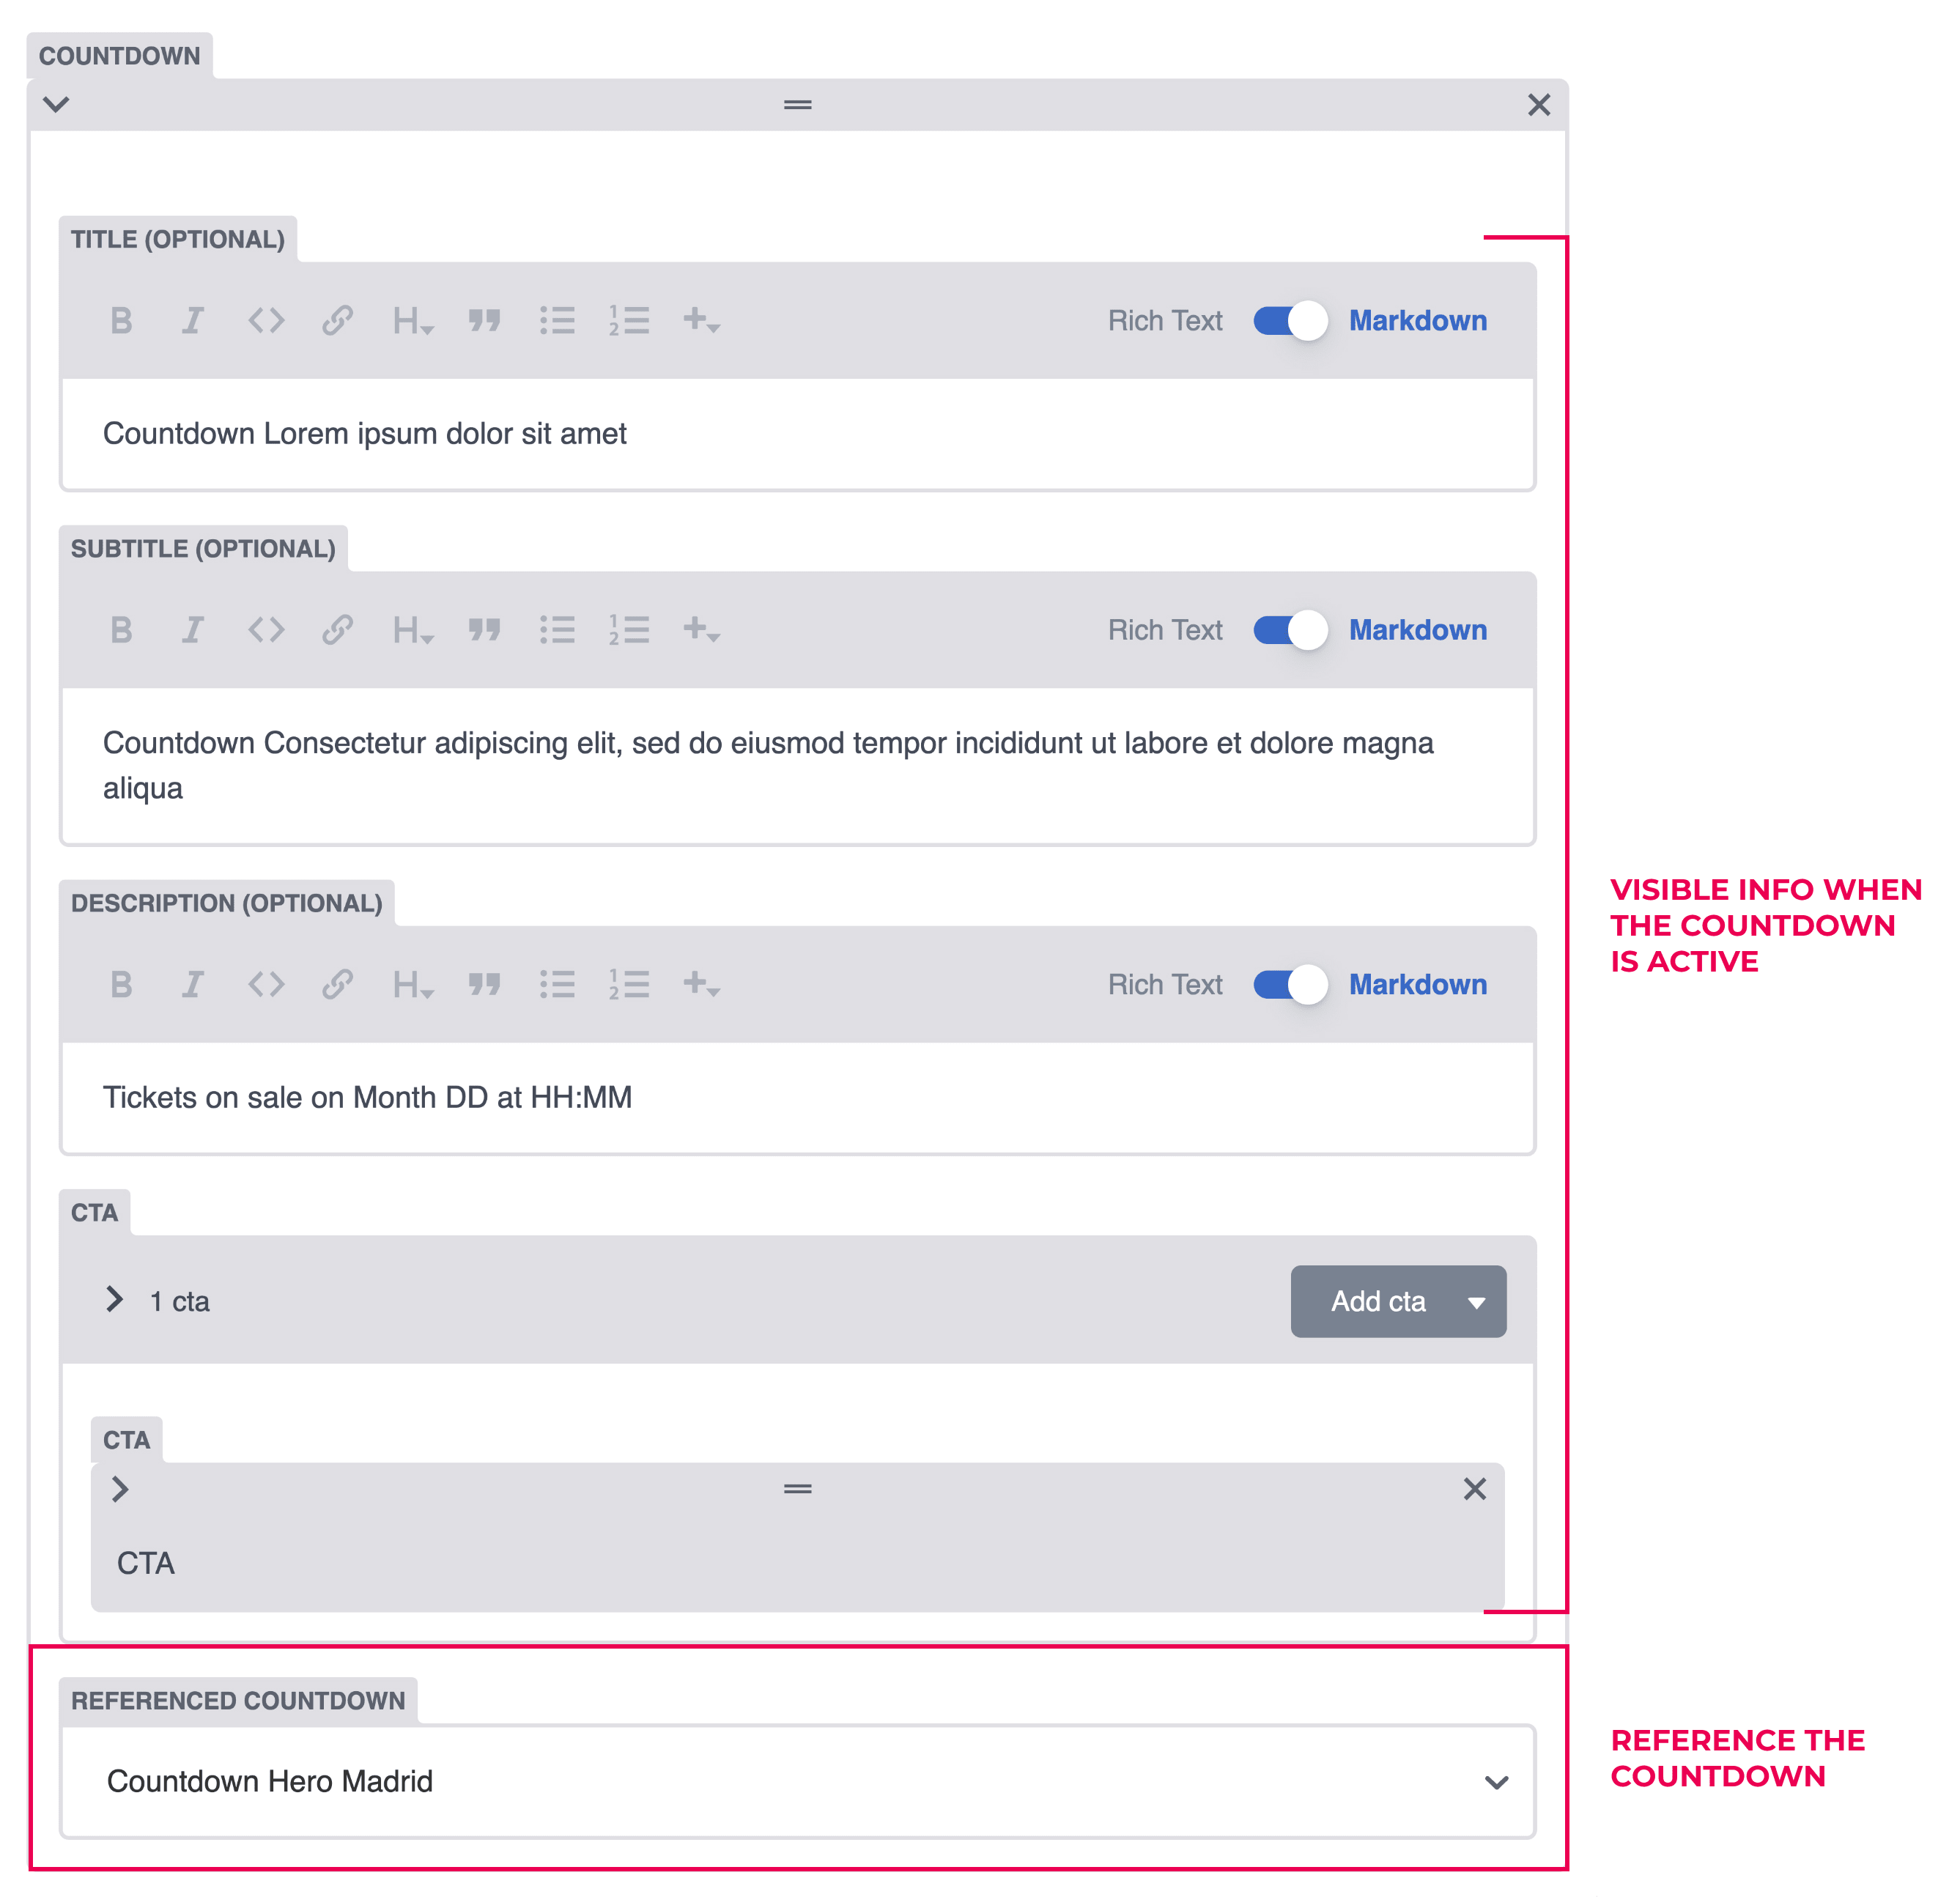
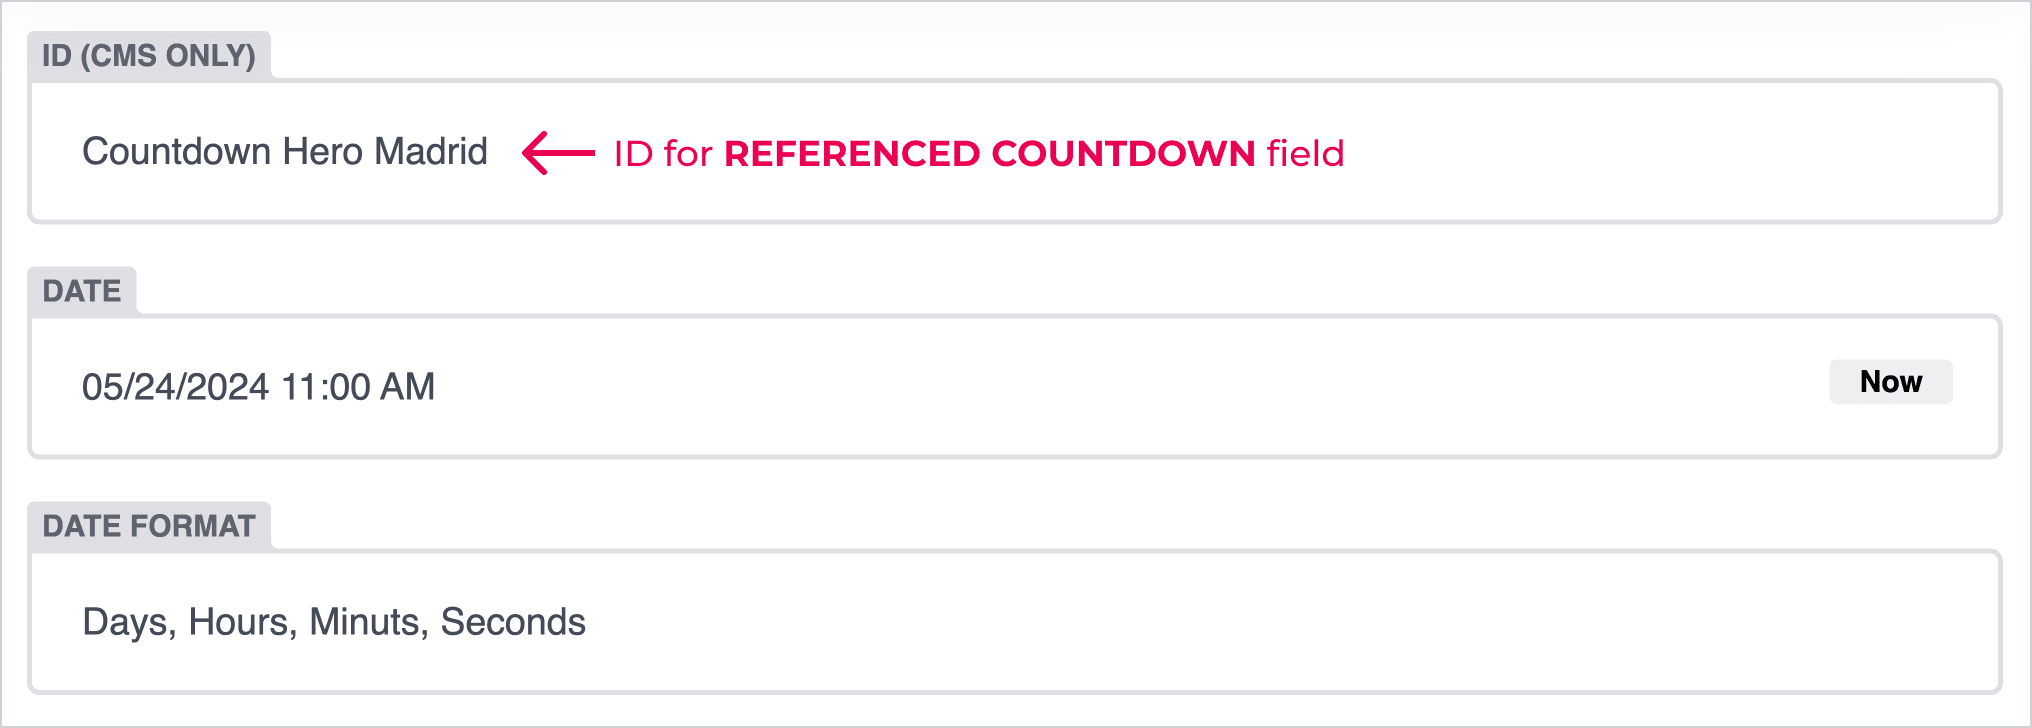
  3. Add the ID (CMS ONLY). Remember to set a descriptive ID and easy to recognize in the “REFERENCED COUNTDOWN” field inside the module settings page.

  4. Add the DATE. Be sure to choose a day in the future and a correct time aligned to the desired time zone.

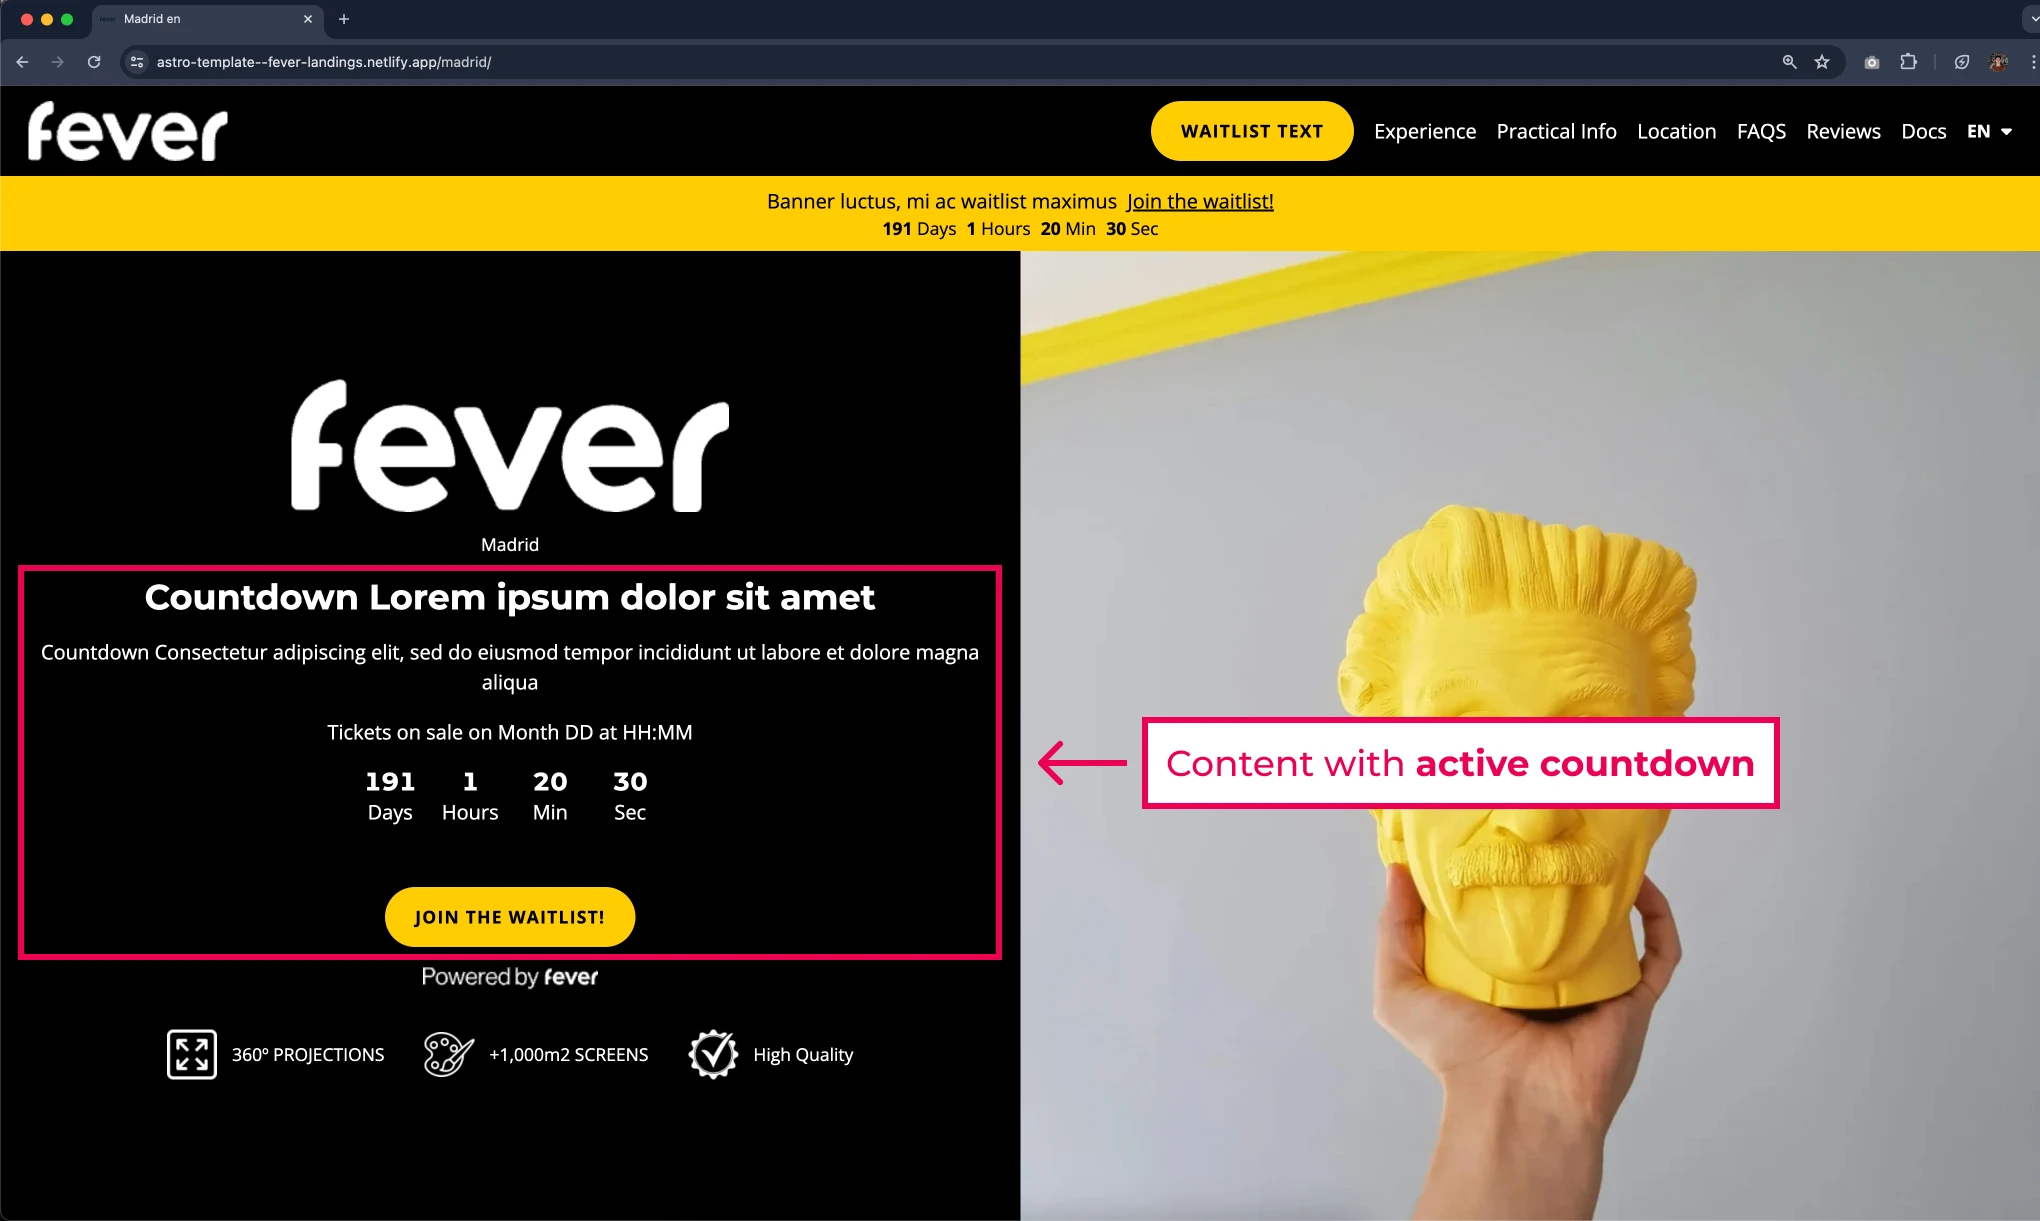
  5. Set the DATE FORMAT. These are the words that will be displayed beside/under each number in the countdown. Be sure to add the four words separated by a “comma” and space” (“, ”). For example: Days, Hours, Min, Sec

  6. Save the changes and stack them.

How to add it?

To add a countdown you will need to: 

  1. Go to the “Main side Navigation”, click on the module where you want to add it (Header, Banner or Hero, only these 3 modules are available to use this functionality). Then click on the entry to edit.

  2. In the “COMPONENTS” tab click on the dropdown and select the “Countdown” component. Please note that the Header module doesn’t require you to do this step.

  3. Fill in the data to be displayed while the countdown is active. This data varies depending on the module that is being edited. To get more detailed information of each module se the next pages:

  4. In the "REFERENCED COUNTDOWN" field, select the countdown that was previously created.

  5. Finally, save the changes and stack them.

How to test it?

This is an IMPORTANT step. Please do it before publishing.

To check if a countdown is working properly, follow the steps below:

  1. Once you have your [changes stacked] and you already [generate and receive the preview link], open it on the browser and look for the page and module where the countdown was added.

  2. Ensure that the content that you see right now corresponds to the countdown phase. For example: the hero CTA redirects to the WAITLIST fever plan and not for the SALES one.

  3. Now you must check if the content is well set once the countdown ends. To do this add in the URL this parameter: “?force_remove_countdown=true”

  4. With the parameter added, the content should change and now you will see how the module looks like when the countdown ends. If something doesn't look right please make sure to fix it, the change from countdown phase to end phase is automatic, as are the content changes this implies.

  5. If everything looks good, now you can publish your changes.