How to create, use and test various types of forms.
The forms are used to collect user information, such as names, emails, phone numbers etc. You can create various types of form in the CMS: Formspree, Zoho and B2B forms.
To add a new form, you need to follow the general steps first (described here) and then add necessary fields depending on the form type you need. You can find them here:
To create a form, follow the steps below:
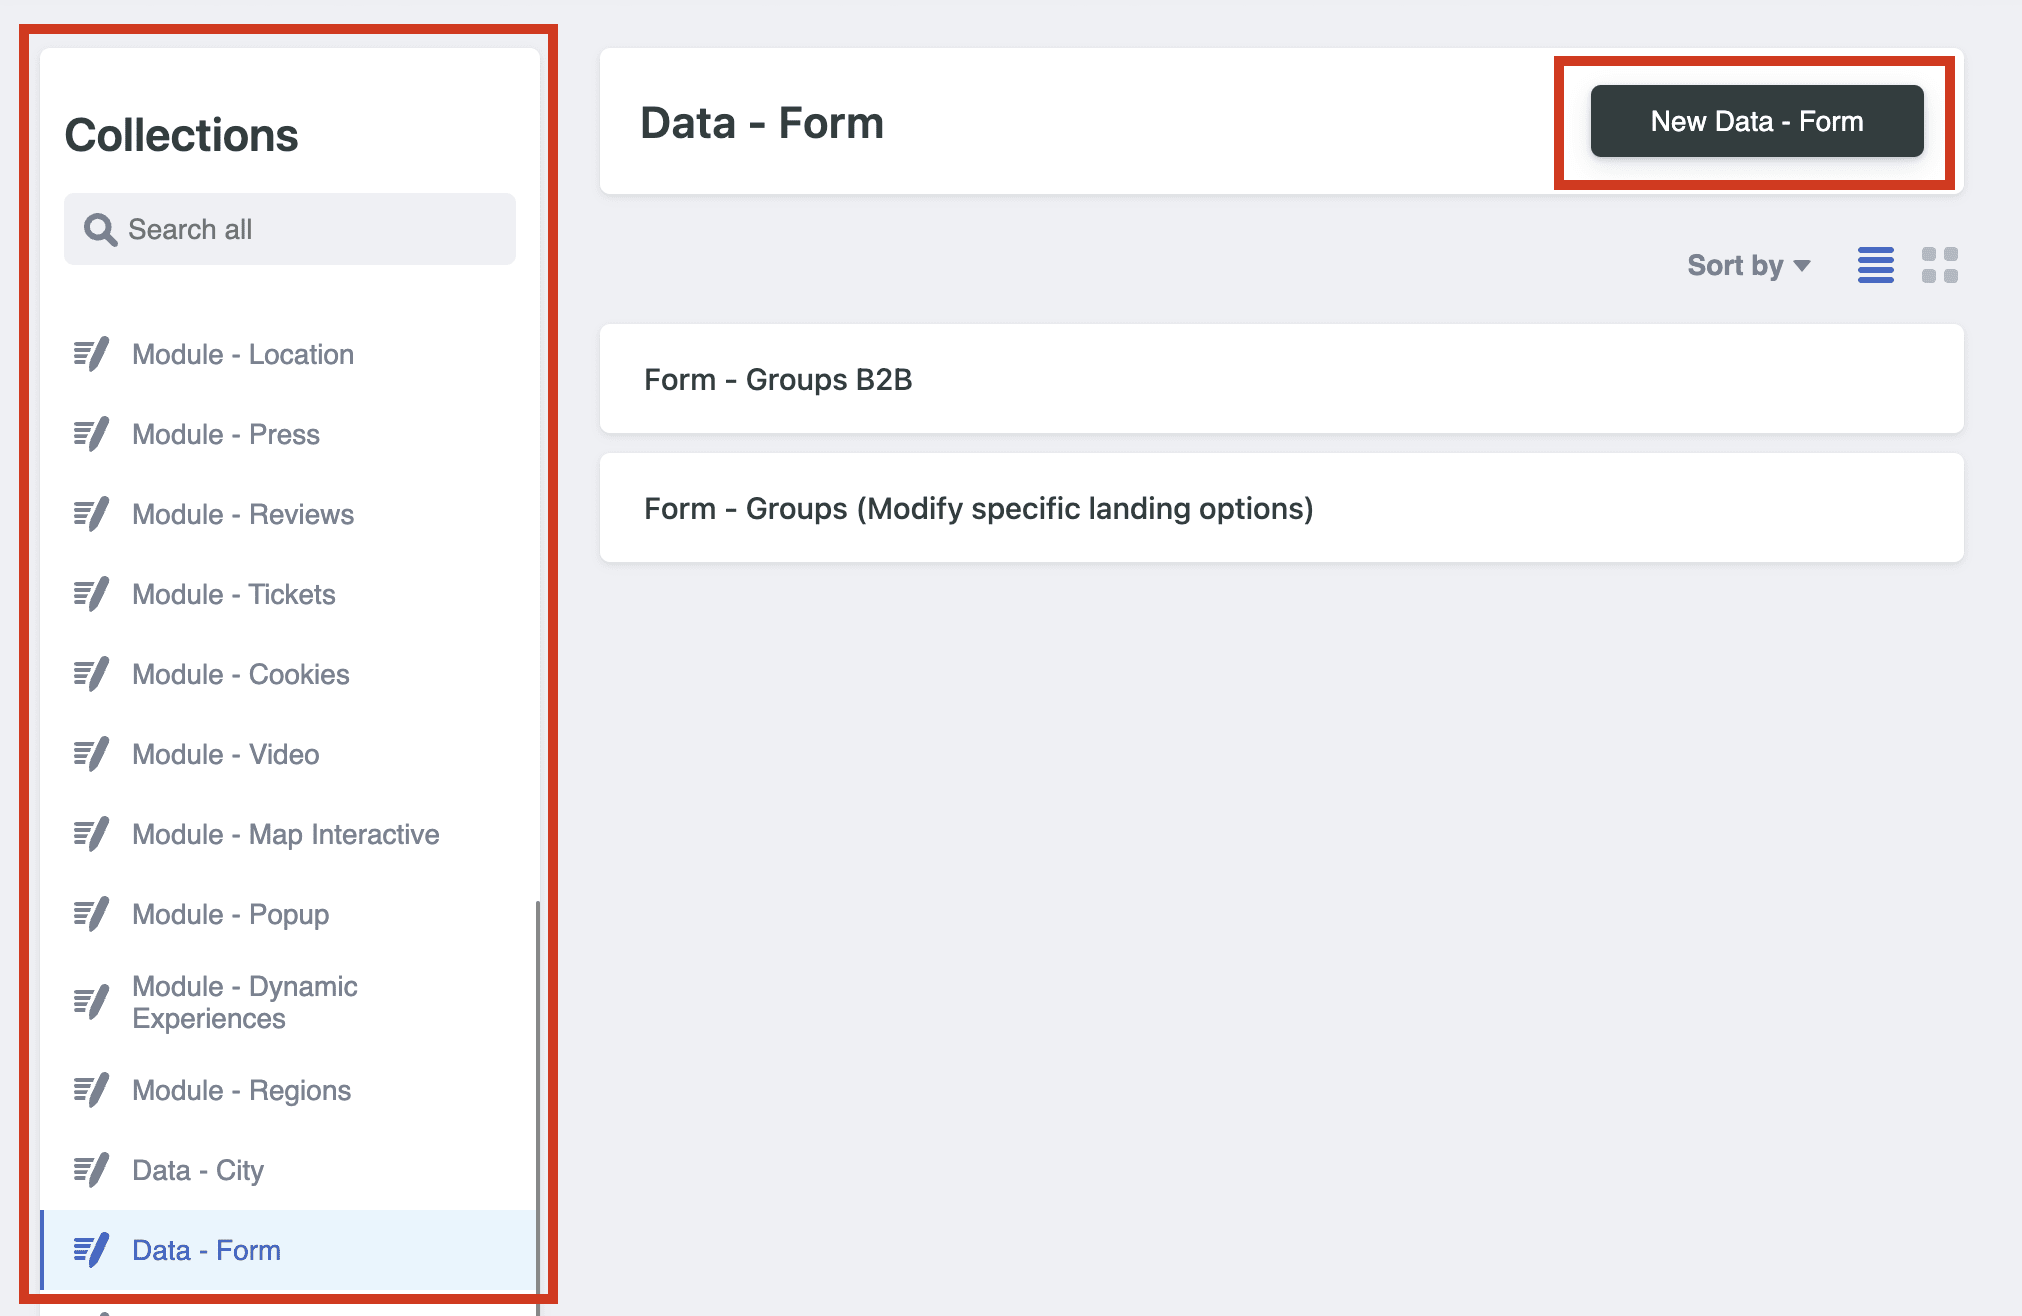
Go to the “Main side navigation” and click on “Data - Form”. Here you will find a list of all the forms that were added previously.
Click on the “New Data - Form” button. This button redirects to the form settings page.
Add the ID (CMS ONLY). Remember to set a descriptive ID and easy to recognise in the “REFERENCED FORM” field inside the module settings page.
Choose to add utms in the form entries if needed. You can add them by enabling the toggle in "Add session utms as form values"
Save your changes and stack them.
With the Form created previously, you can start adding the fields necessary for a Formspree form.
To create a form connected to Formspree, you will need the form ID link (that usually looks like this: https://formspree.io/f/manwyddw) and the list of inputs (data to collect) you want to add.
Before adding your inputs, you need to set up necessary fields for the Form:
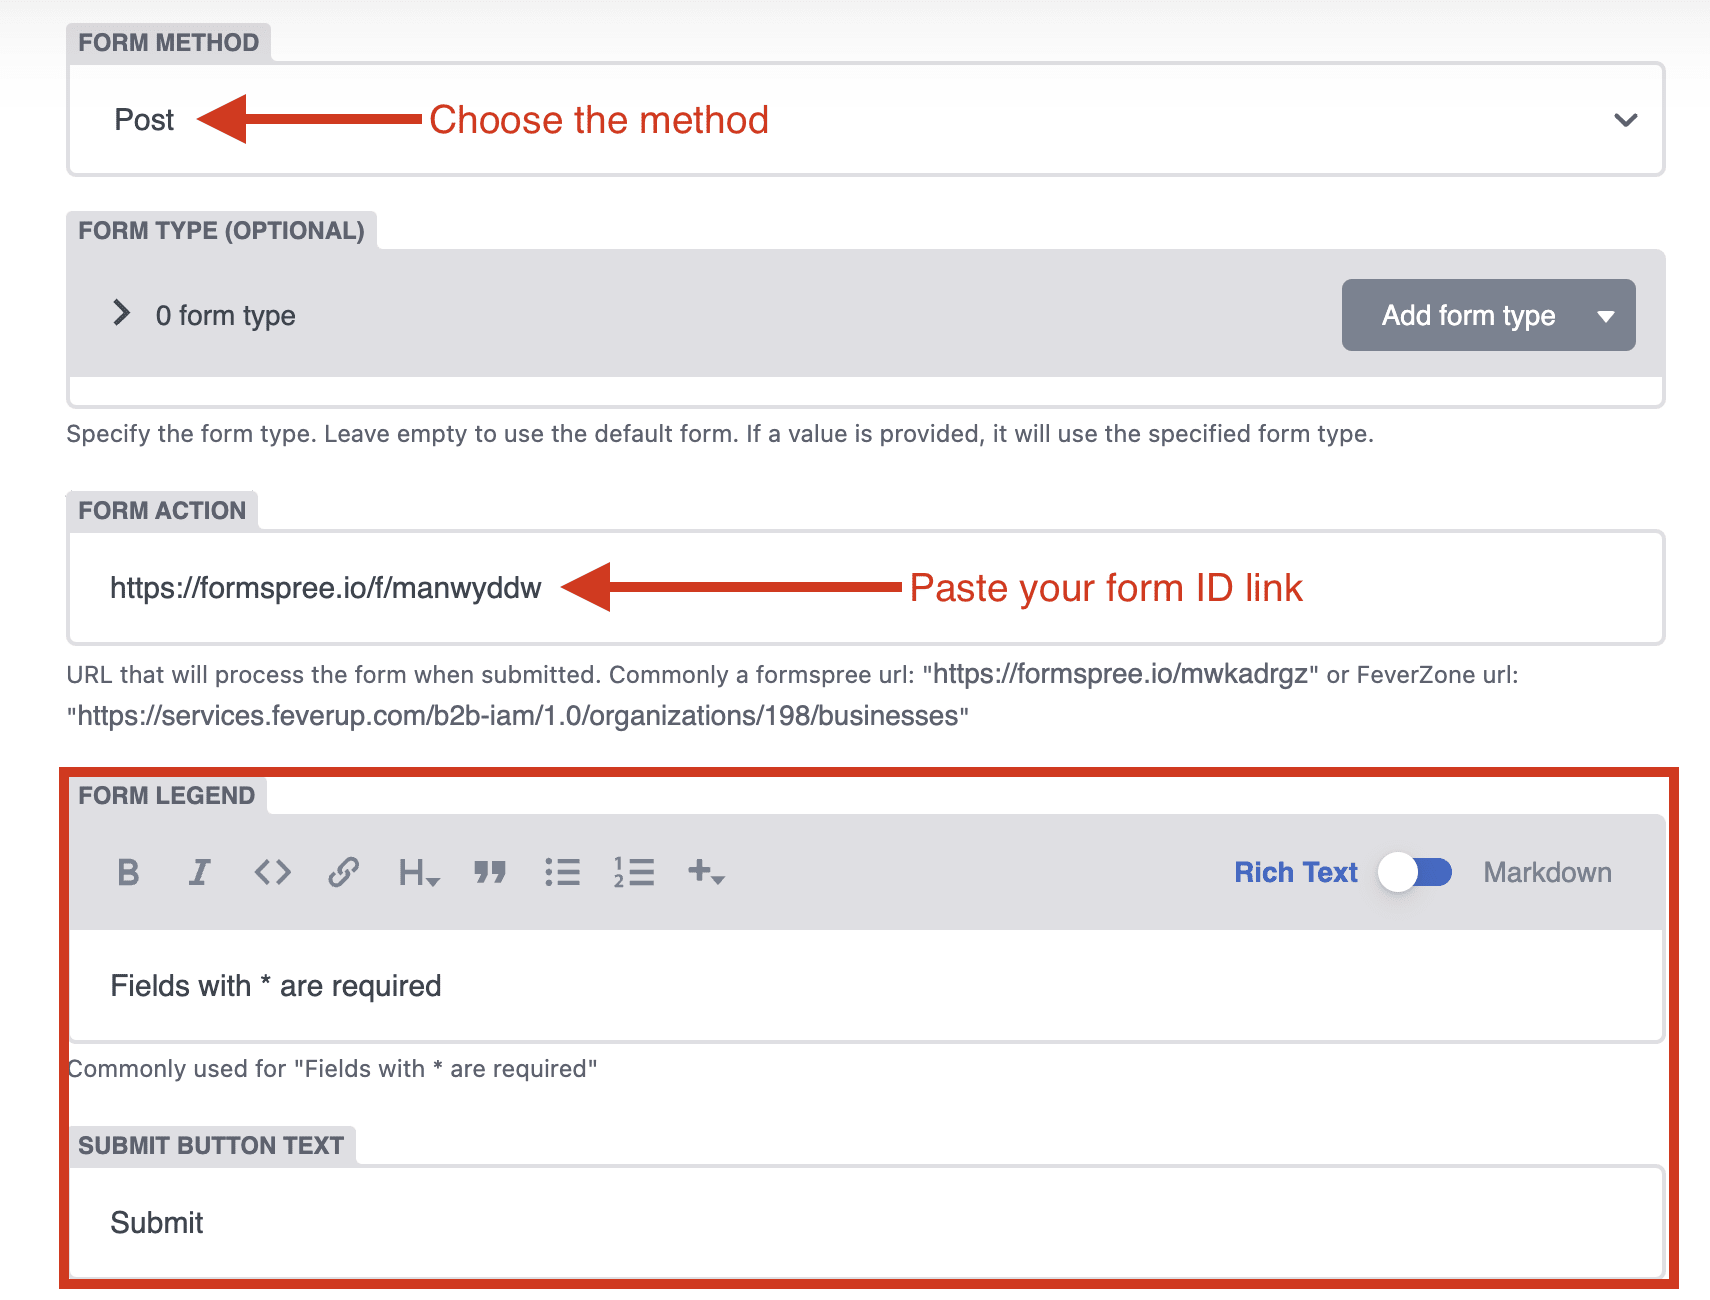
Choose the Form Method from the drop down list (usually "POST").
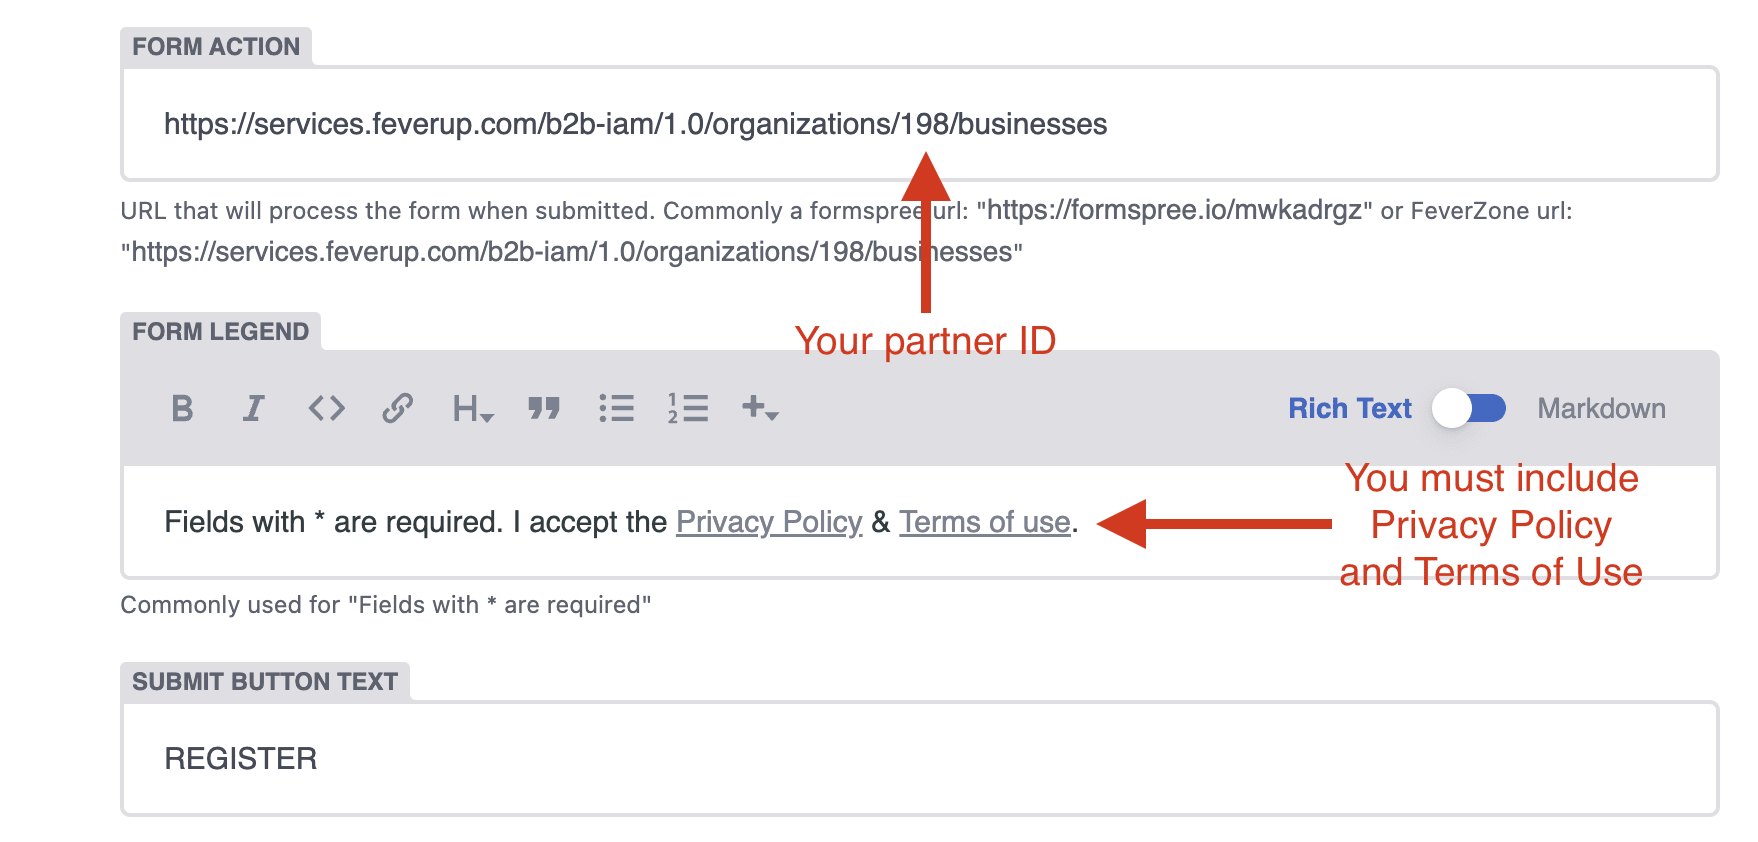
Paste your form ID link in the Form Action.
In the Form Legend, add a text you want to have under the form (for example, "Fields with are required"*)
Add Submit Button Text. This will be the button that appears under the form to submit the entries.
Now you can add your inputs. Choose an input type from the input drop down list in "Add inputs".
You can find the list of possible inputs here.
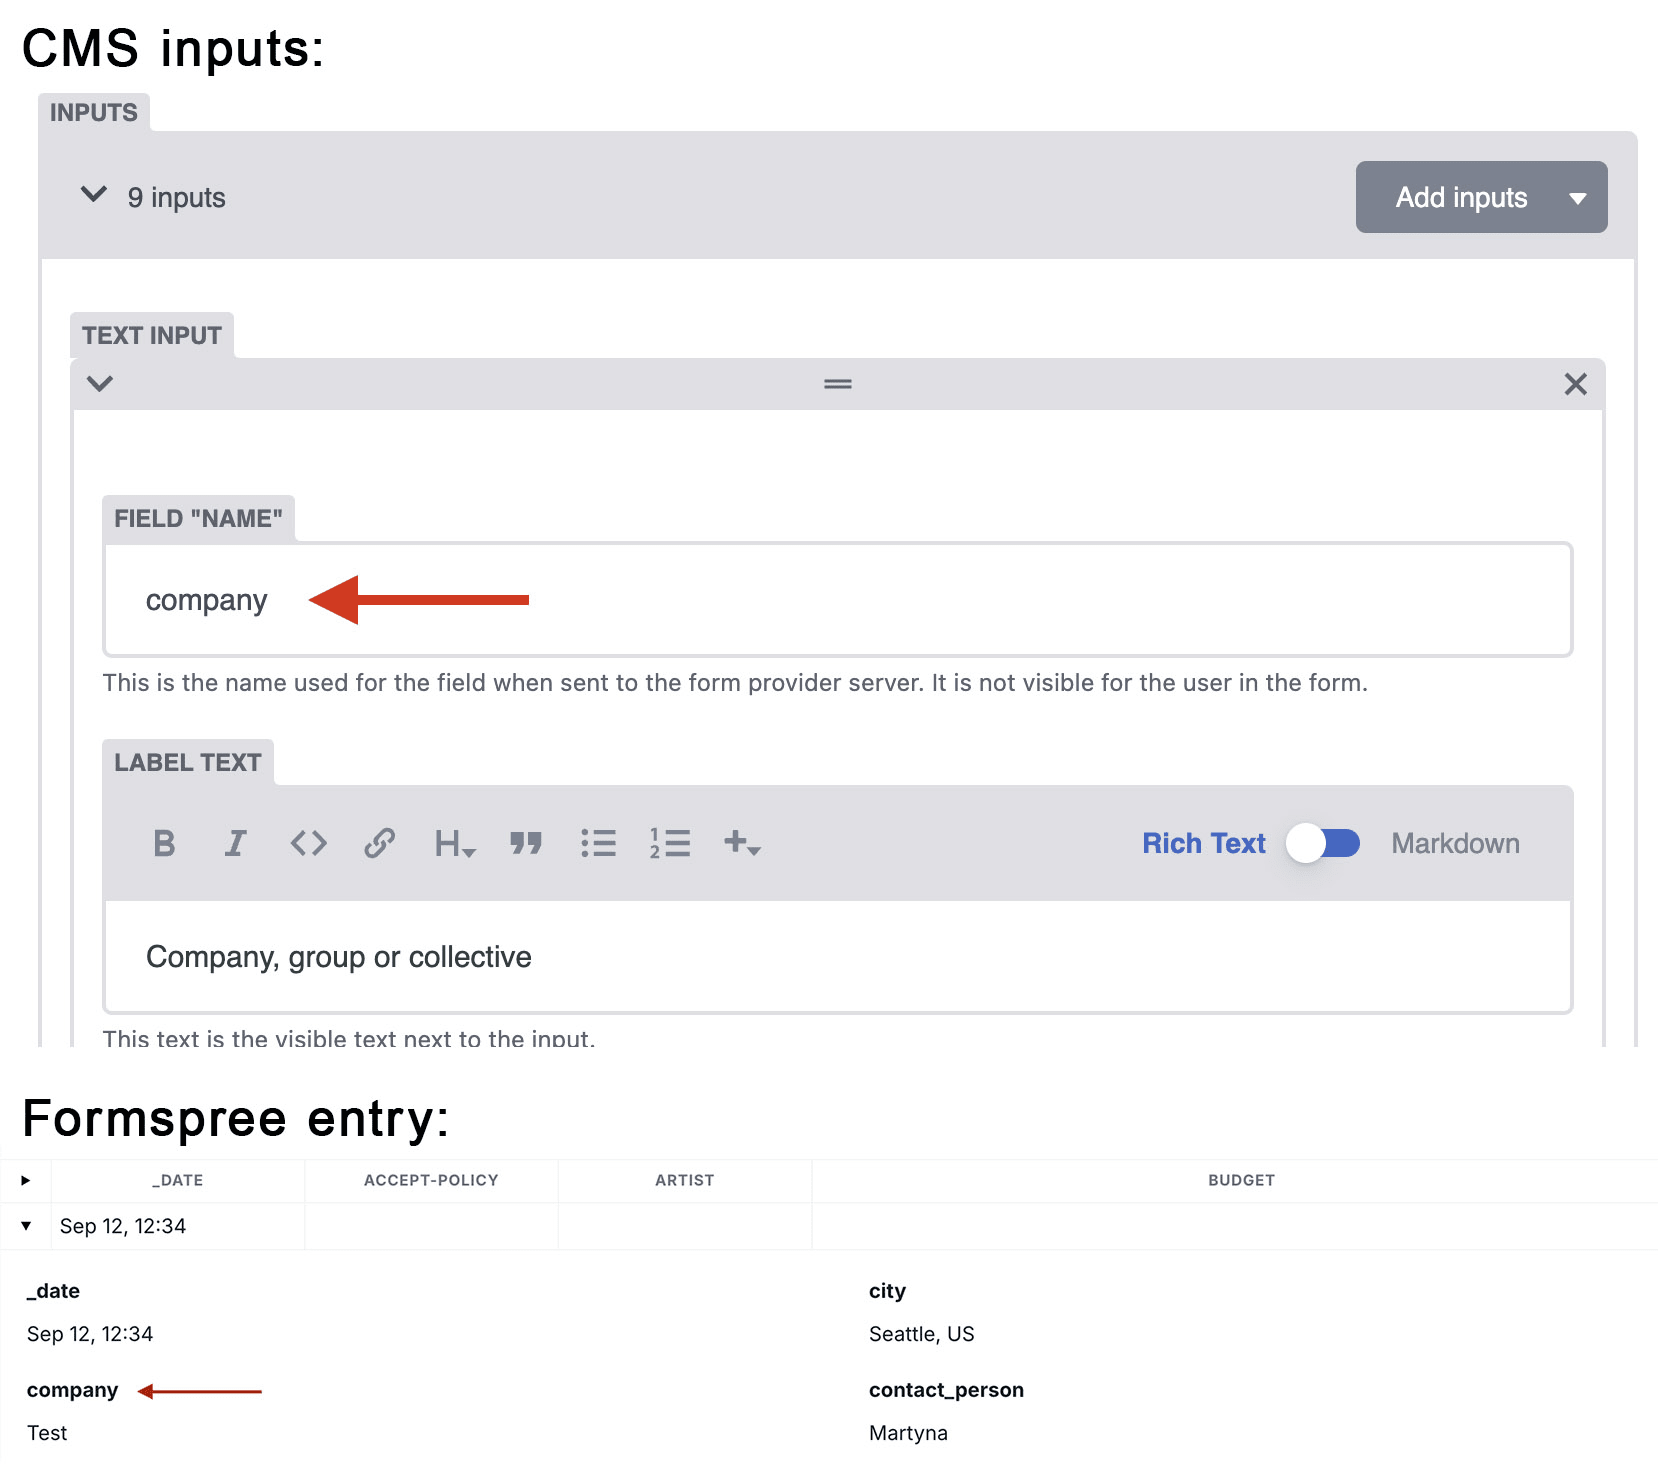
Please note that for each input, the name you add in the "Field name" will be the name of the data collected in Formspree.
Remember to save your data and stack changes.
With the Form created previously, you can start adding the fields necessary for a Zoho form.
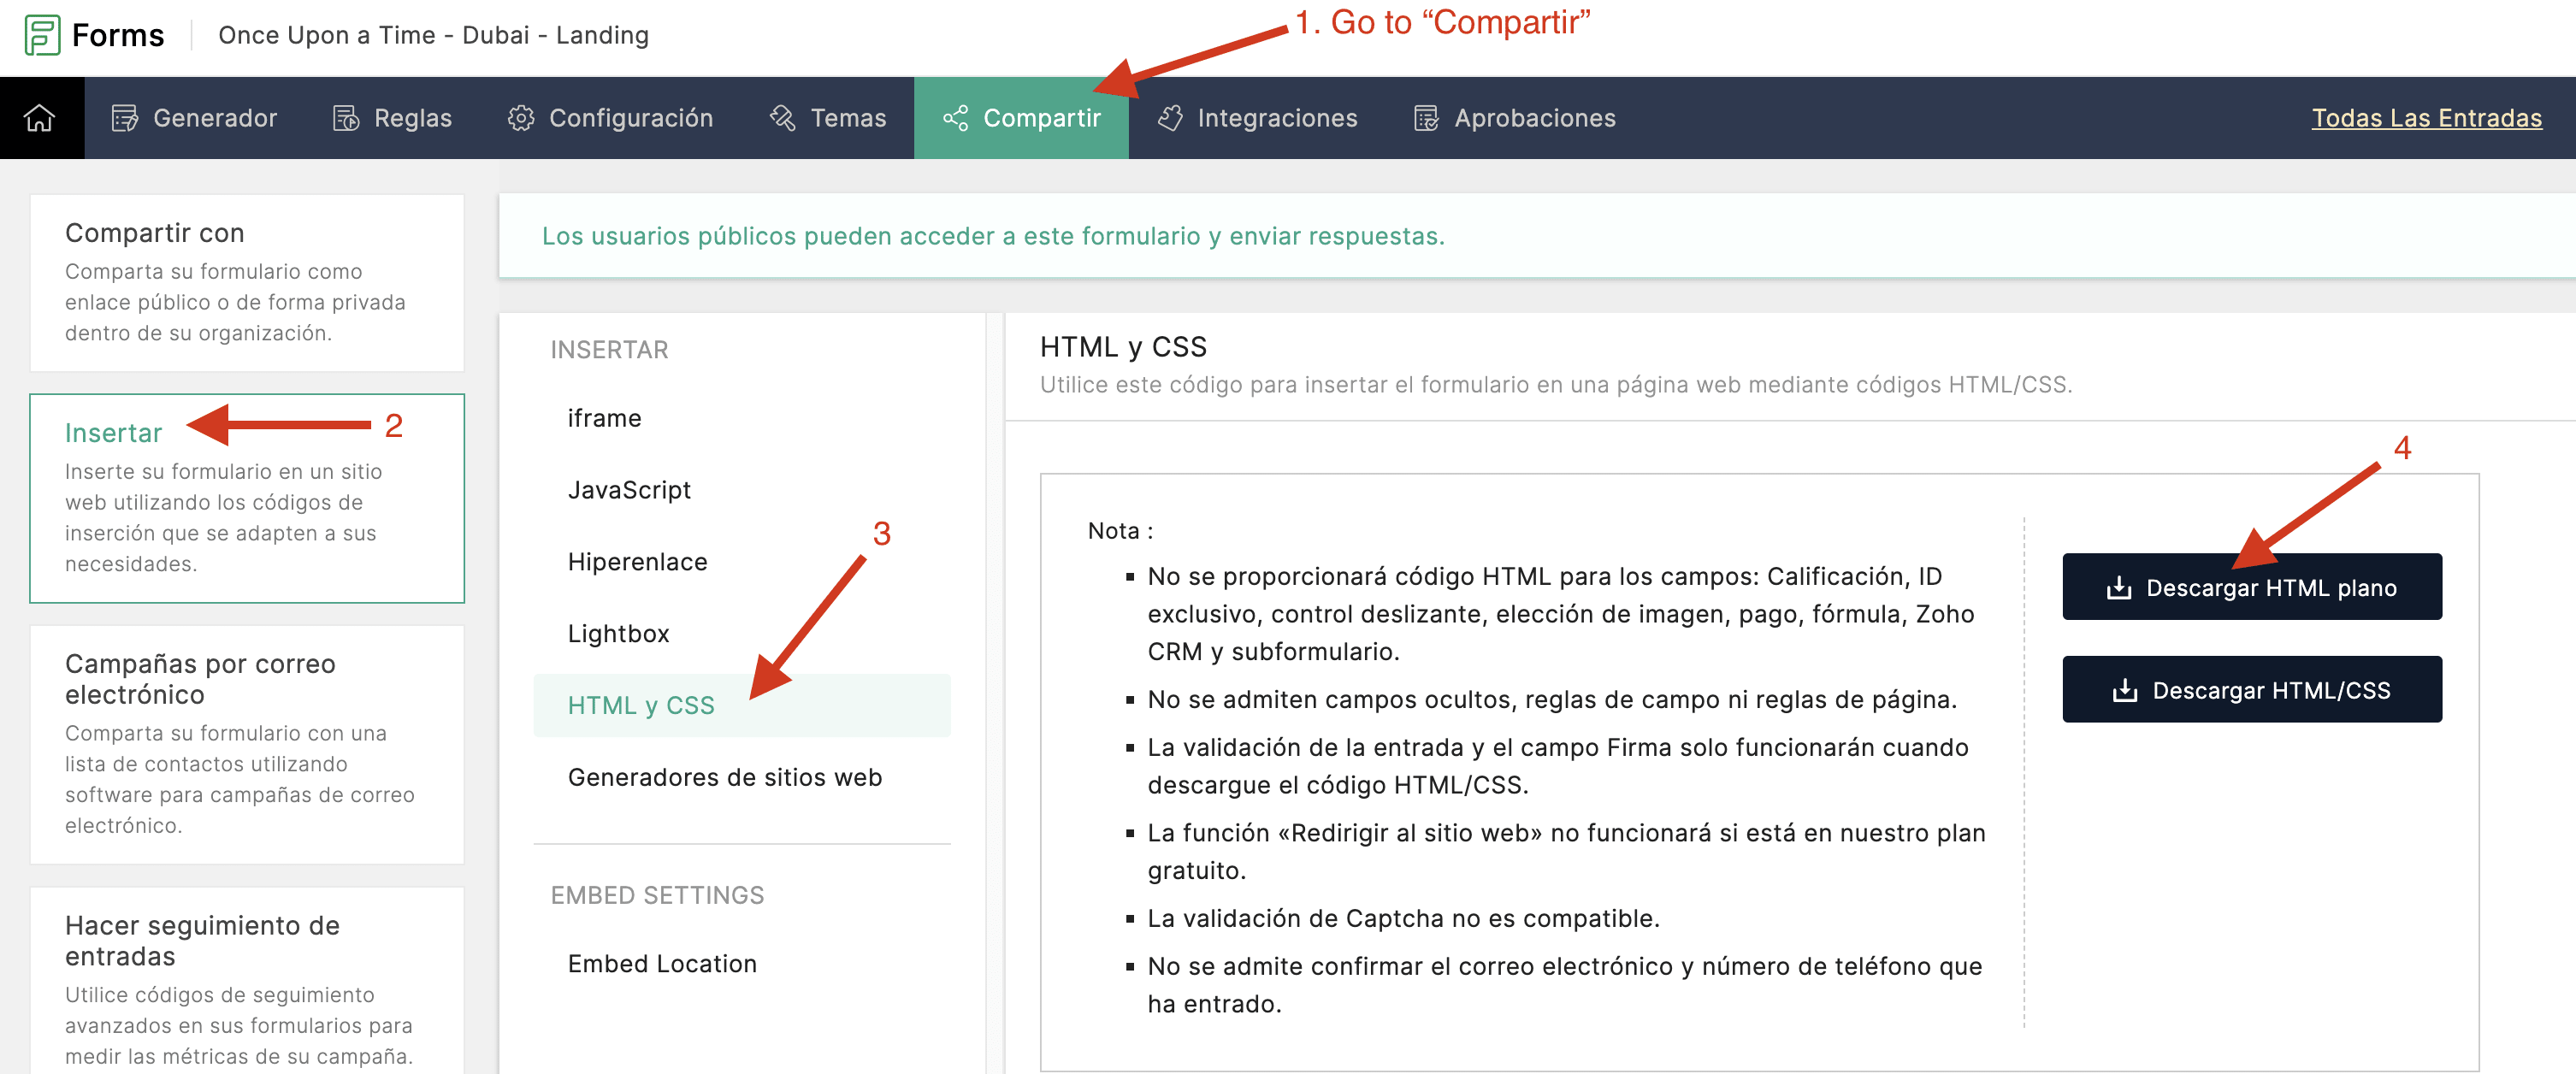
To create a form connected to Zoho, you will need to create a default Zoho form in Zoho platform first.
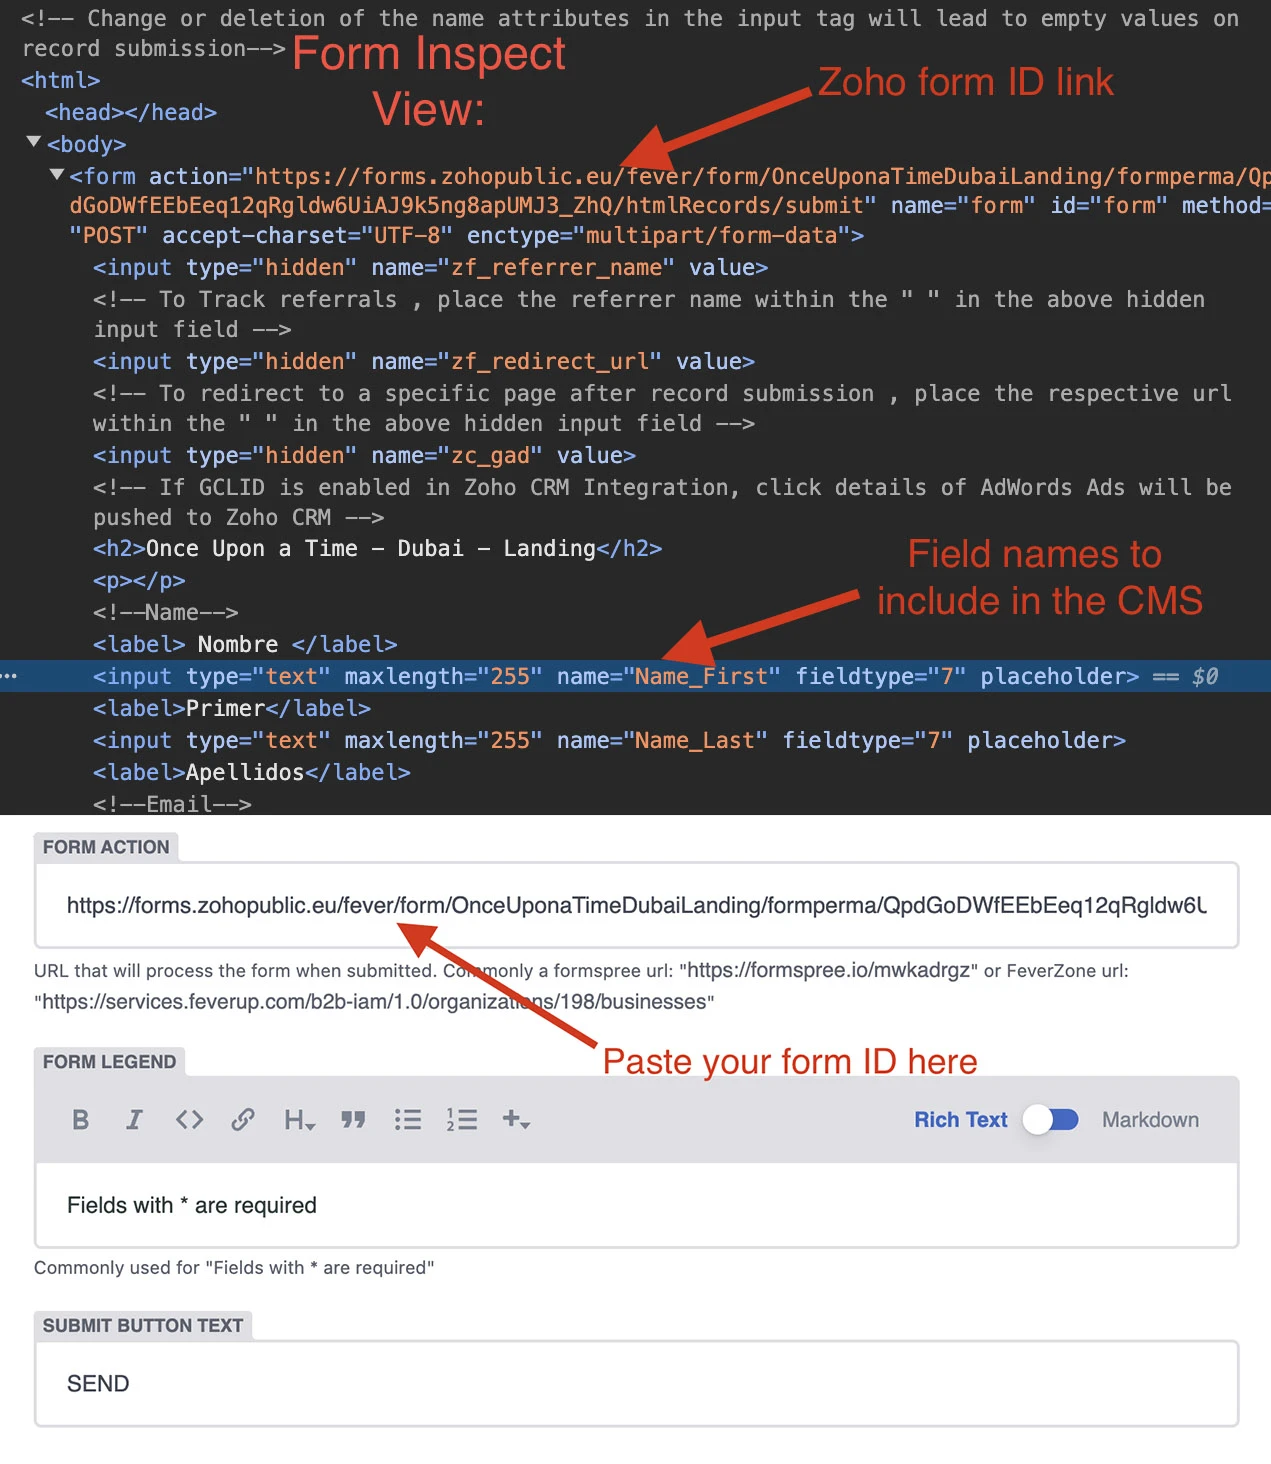
Then you will need to obtain the form ID link (that usually looks like this: https://forms.zohopublic.eu/fever/form/FormName/formperma/QpdGoDWfEEbEeq12qRgldw6UiAJ9k5ng8apUMJ3_ZhQ/htmlRecords/submit) and the list of created inputs from the Zoho page.
Enter Zoho forms page (https://www.zoho.com/forms/) and login with Fever pass.
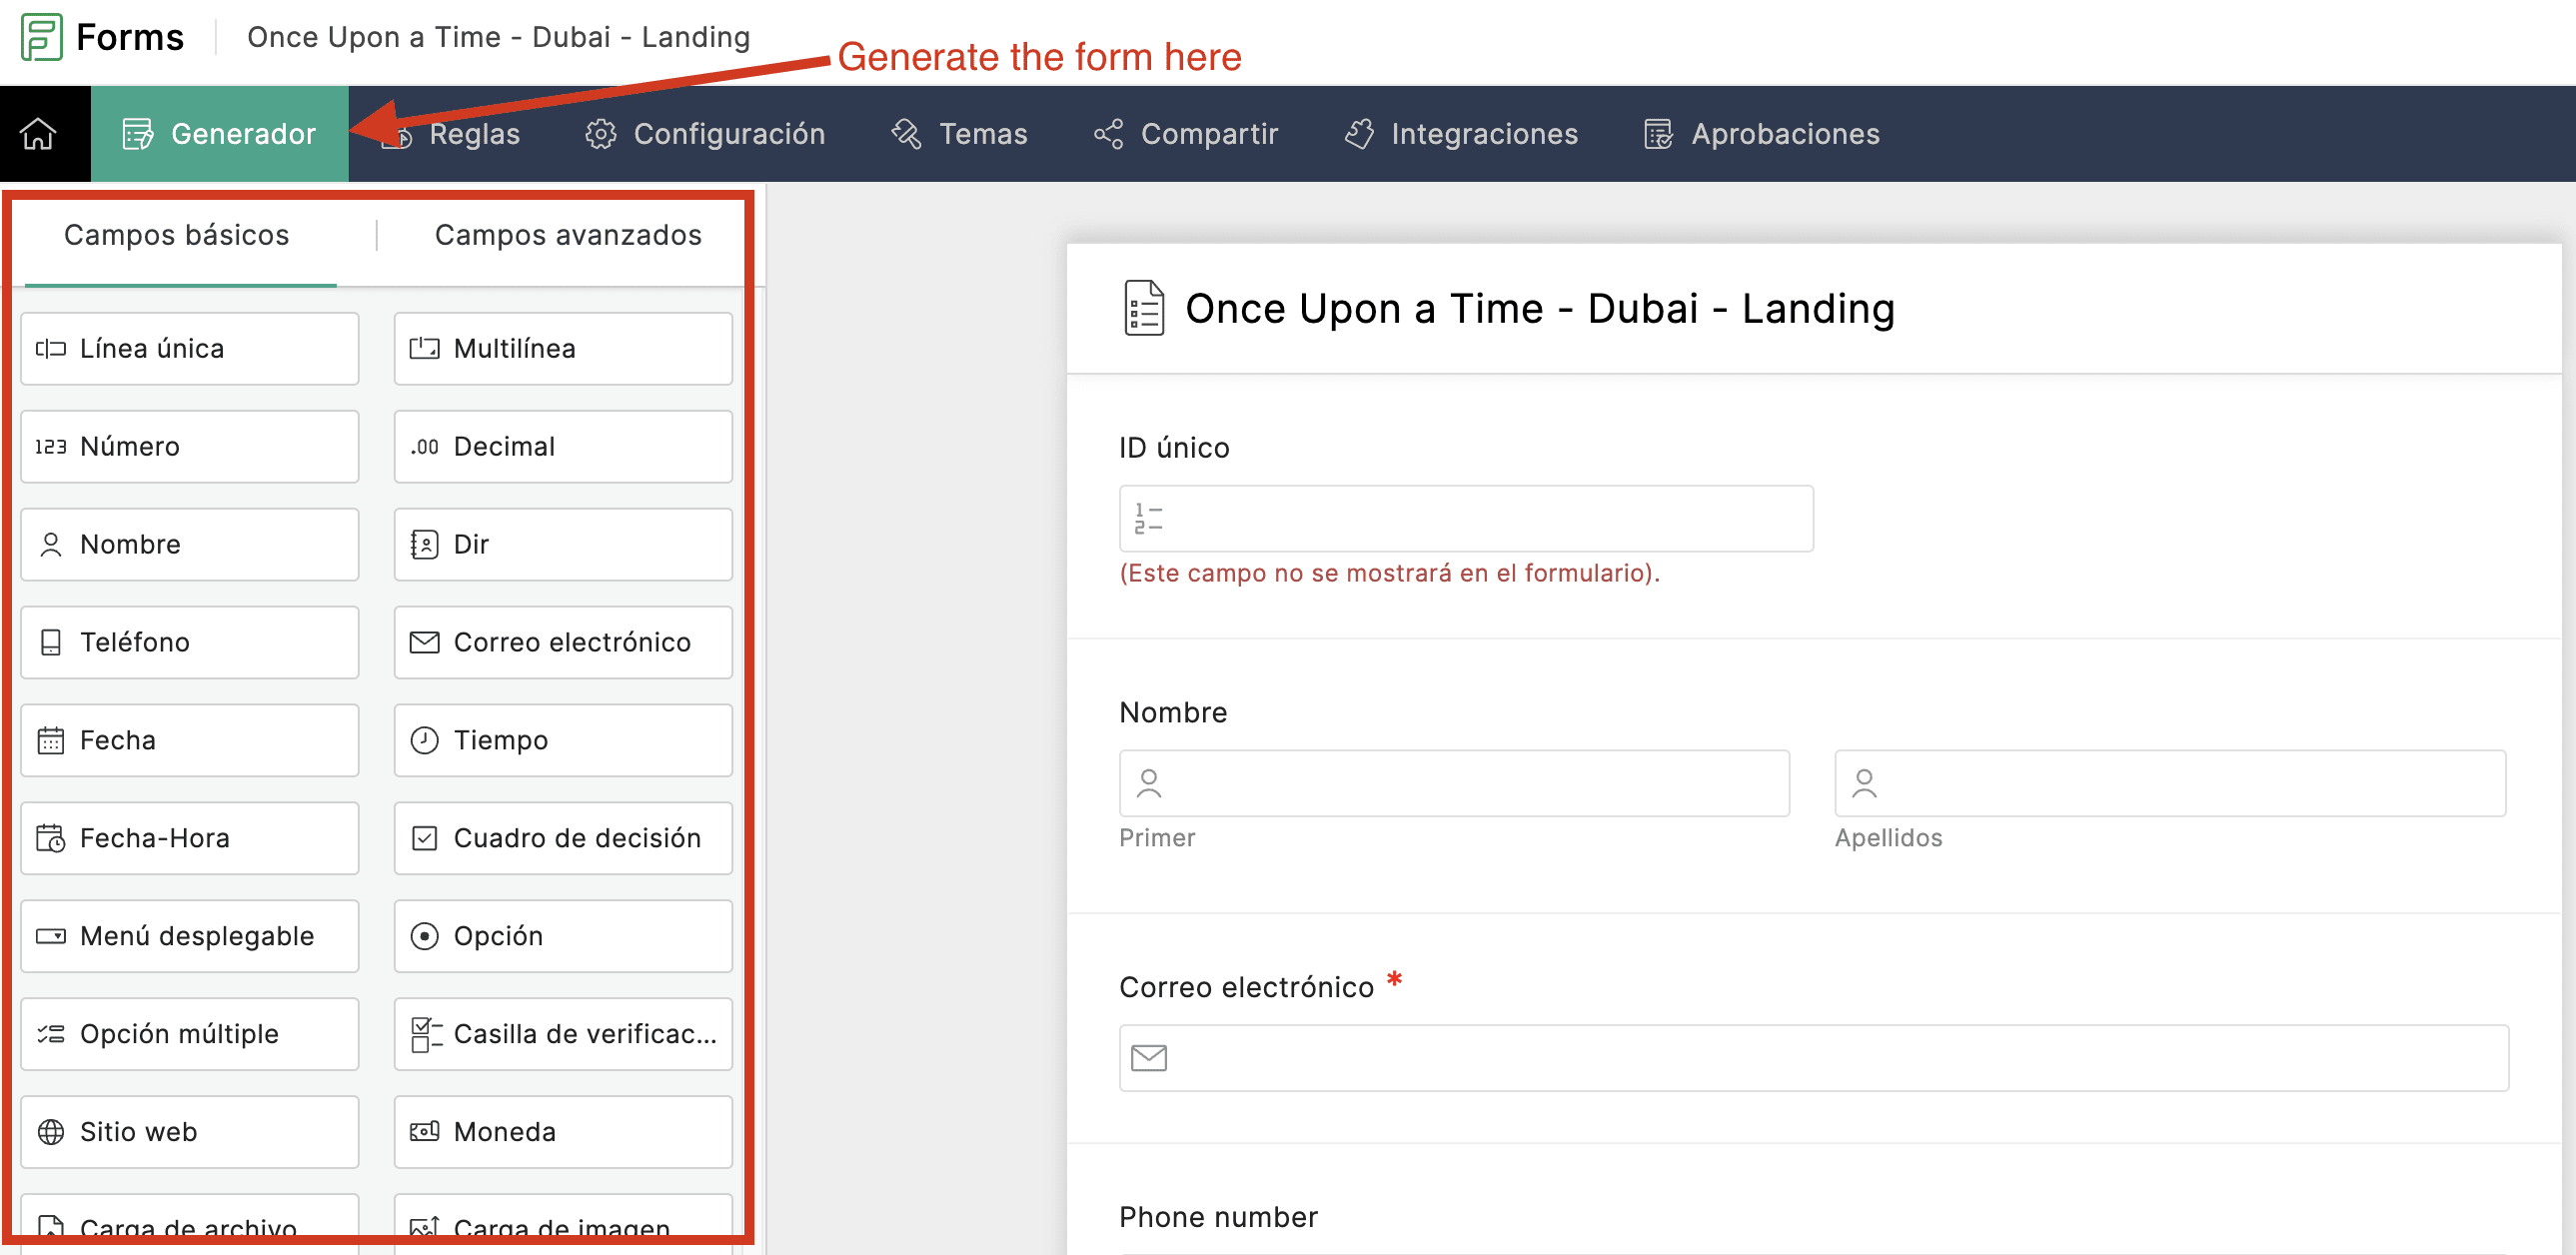
Add new form by clicking "Nuevo formulario".
Add the necessary inputs in the form generator ("Generador"). Choose the input types from the list provided by Zoho, but please note that not all of the inputs are available in the CMS (find available inputs here).
Now once you have your index.html file downloaded and open, you can start editing your form in the CMS.
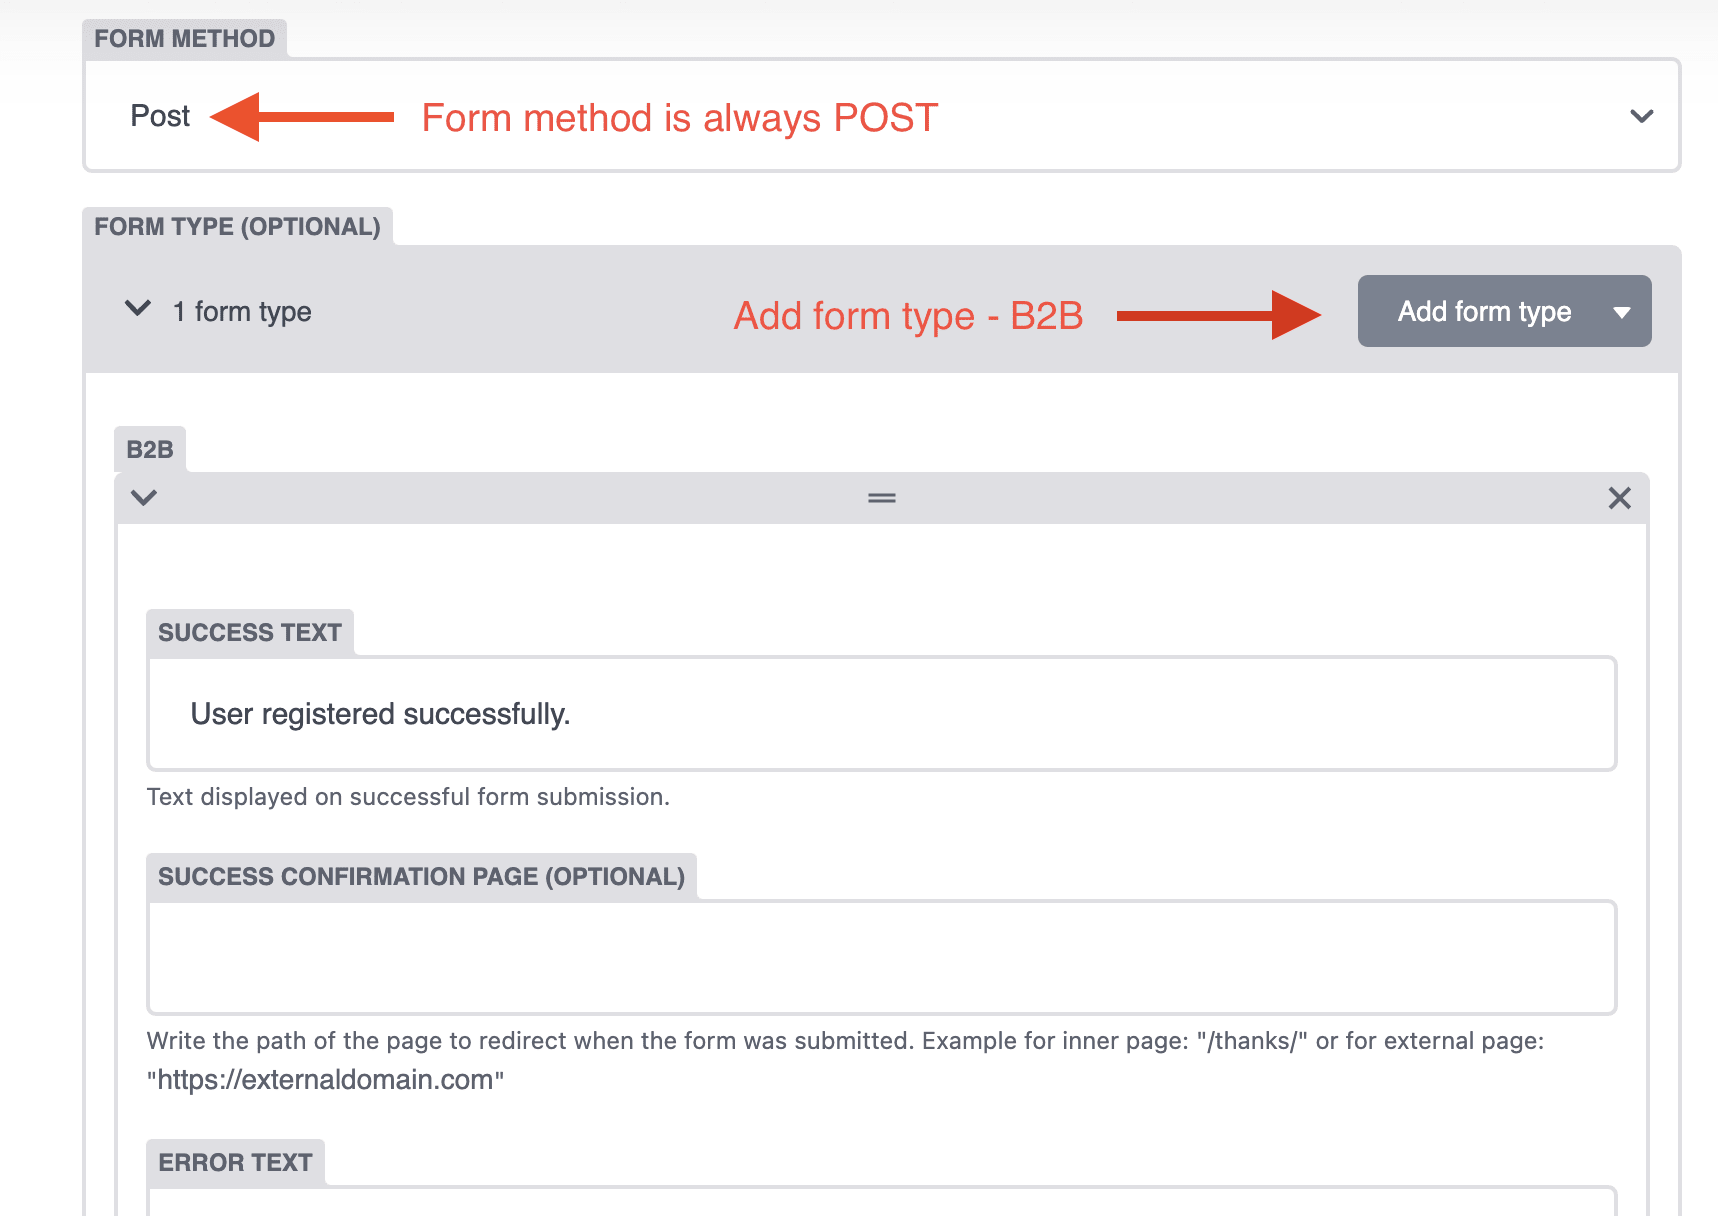
Choose Form Method - POST.
Paste your form ID link in the Form Action (you will find it in the "action=" field)
In the Form Legend, add a text you want to have under the form (for example, "Fields with are required"*)
Add Submit Button Text. This will be the button that appears under the form to submit the entries (eg. "Send")
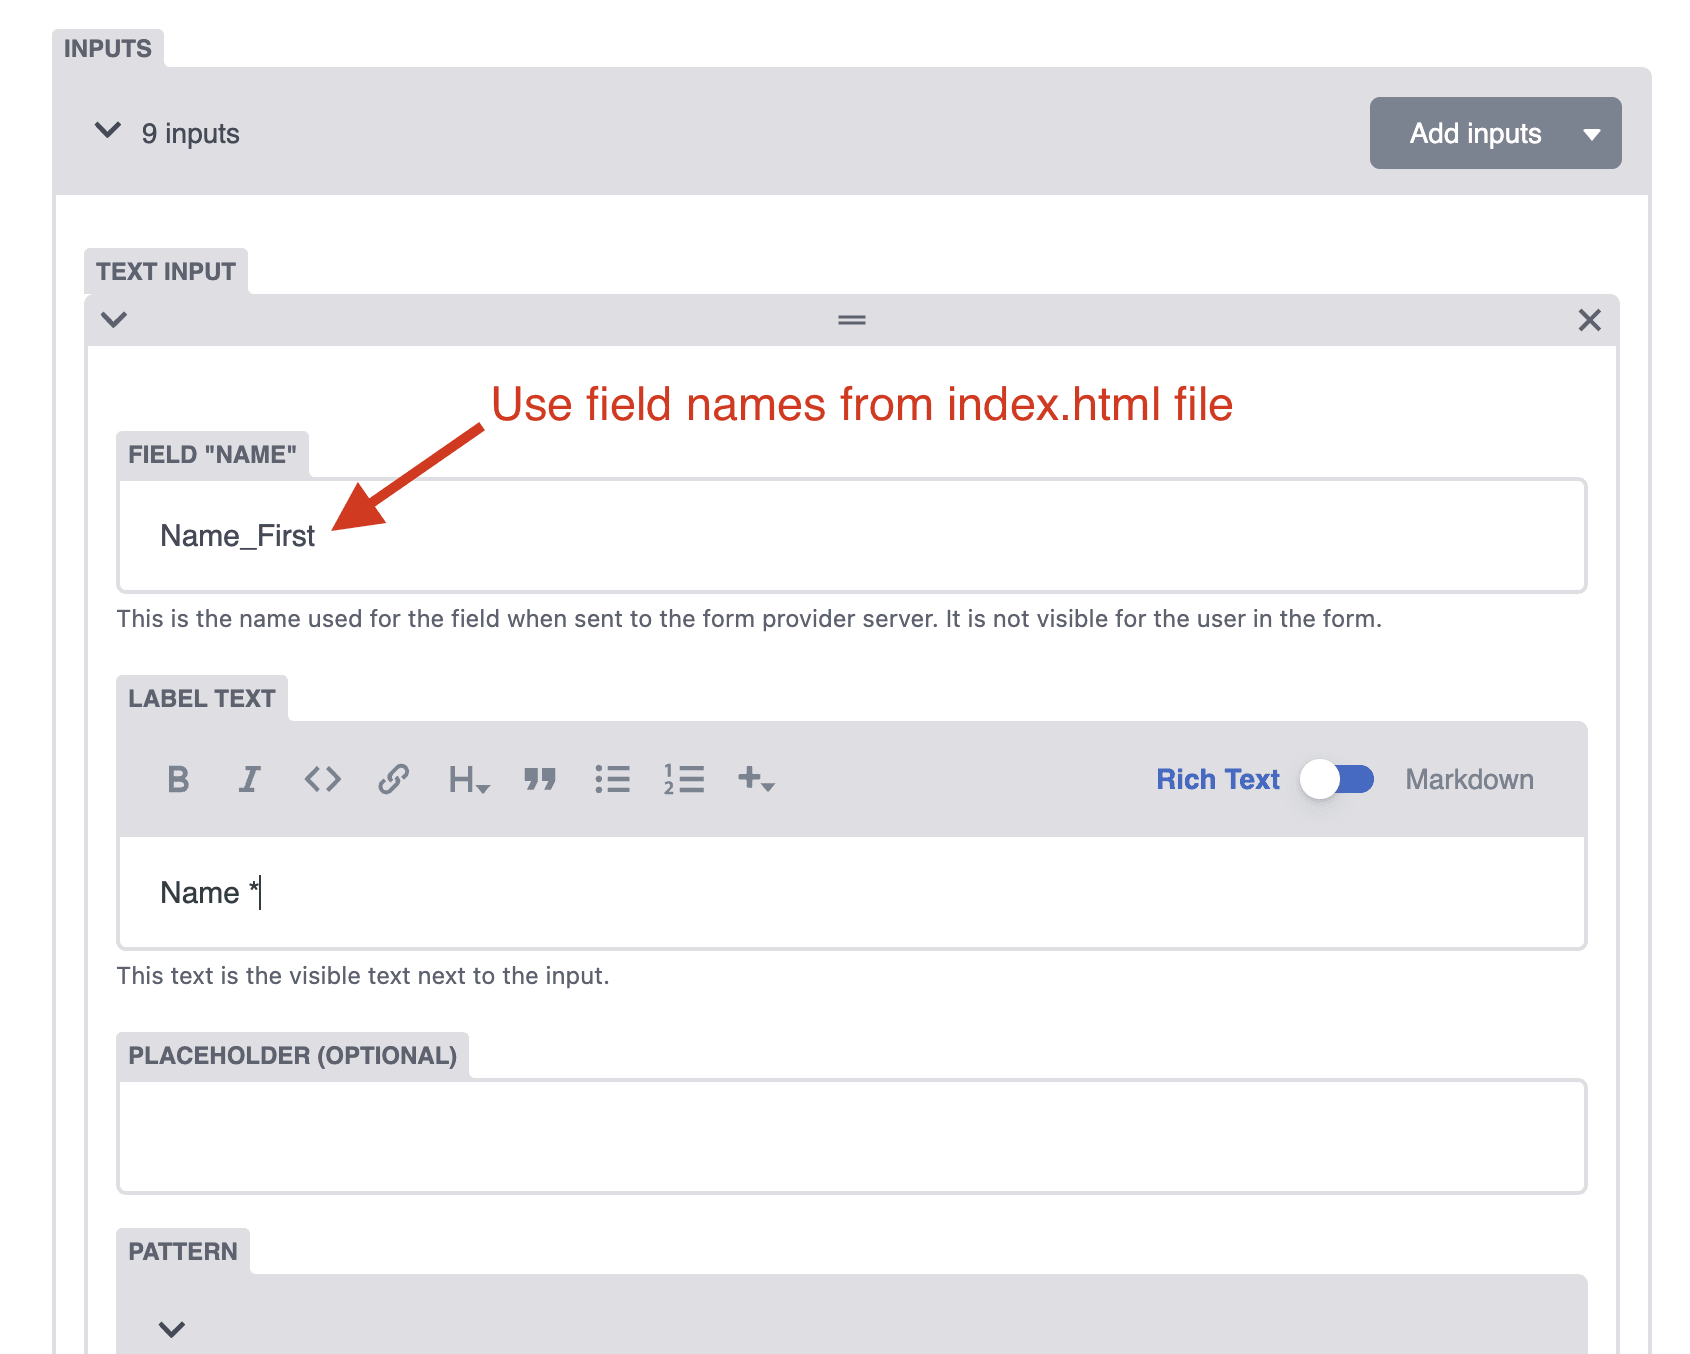
Now you can add your inputs. You will need the inputs' names from the file you downloaded to connect CMS input with Zoho entry. Choose an input type from the input drop down list in "Add inputs".
You can find the list of possible inputs here.
In the "Field name" of each input, include the name you obtained from the index.html file (for example Name_First, Name_Last, Email... etc).
⚠️Zoho forms will only accept the values created previously in Zoho generator and with the same name as in the index.html file.⚠️
Remember to save your data and stack changes when you're done.
With the Form created previously, you can start adding the fields necessary for a B2B Form.
To create a form connected to Fever Zone, you will need the partner ID link (usually looks like this: https://services.feverup.com/b2b-iam/1.0/organizations/198/businesses) and the list of inputs (data to collect) you need.
Before adding your inputs, you need to set up necessary fields for the Form:
Now you can add your inputs. Choose an input type from the input drop down list in "Add inputs".
You can find the list of possible inputs here.
Please note that for each input, the name you add in the "Field name" will be the name of the data collected in Fever Zone. Remember that the B2B form only accepts particular fields that can be found in this document.
You need to remember also:
B2B forms must contain 5 required fields: name, contact name, phone number, email and business types.
The “name” field of each input must be included in the field list that you can find here.
It has to be identical to the one in the document, with minuscules and special characters included.
“Country_code” field accepts only country codes (ES, US, UK…), so keep that in mind when creating a country selector.
The “business_type” field can be a multi-select field or hidden field. You can add as many options as you need in the select input, but remember that the options' values must be the same as the ones in the document, with minuscules and special characters included. In the options' label you can add any text you want.
Remember to save your data and stack changes.
Each input you add in your form has a "Field name" used to send the data with the form entry, "Label" that is displayed on the page, and "Placeholder" that is a explanatory text inside the input box. You can also add a pattern that needs to be followed for each input (only numbers, only letters etc.) and toggle if the field is required or not.
Please find here the available input types:
A basic input that accepts a text line in an entry.
An input to collect email data. In this input, you need to add an error message for when the email format is not correct (doesn't have @ character etc). In this field you can also add "Repeat email validation" that will create second email input to check if both inputs contain the same email.
An input to collect phone number data. You can include phone pattern to make sure the phone number is submitted in the format you need.
An input that only accepts numerical data. In this input you can set the max and min number.
An input with date selector. In this input you can choose the date range of available dates.
Similar to text input, but will be shown as a text box of various lines.
An input with a checkbox, used for example for accepting Privacy Policy.
An input that will create a set of radio buttons (circles) with assigned values. Only one button can be selected.
Similar to radio input, will create a drop down list of options with assigned values. Only one option can be selected.
An input used to send additional data without being shown in the form on the page. You need to assign the name and value that will be sent. You can use it for example when sending the experience name, or the experience city.